
BioCair Ultimate Dry-Mist Automobile Disinfection Machine keeps bacteria, germs and viruses away from home!
Do you know that viruses can remain airborne for 3 hours or longer?
Thankfully, BioCair’s patented BC-65TM solutions disinfecting dry-mist can be used to safely and effectively eliminate 99.999% of airborne and surface bacteria, viruses and germs within 60-seconds. BC-65 revolutionary technology is based upon human immune system’s ability to fight bacteria, protect and heal the body and is widely used by leading healthcare facilities for aerial and full-room disinfection. Do you know BioCair is extensively tested and proven to kill 99.999% pathogens according to the US Pharmacopoeia Standard, which includes including many of the common viruses and bacteria such as Coli (causes diarrhoea) and Candida Albicans (causes rashes) and other common flu and viruses.

Mama have been trusting BioCair since Avery is an infant and we love that all BioCair products including pocket spray, disinfectant solution and dry mist are alcohol-free, non-corrosive, non-toxic, non-irritant to skin and eyes, food grade and safe to use around children.

With their latest product launch, Ultimate Dry-Mist Automobile Disinfection Machine helps improve air quality and kills any airborne and surface pathogens which keeps us safe and prevents us from bringing home any bacteria and viruses! Both Papa Chia and Mama works in a retail industry which requires us to visit crowded places and malls for work! This machine comes in really handy for us.

The automobile disinfection machine is portable and designed to fit into the cup holder compartment. With a plug and play USB cable, Mama do not have to worry about charging them before use. Each packet of BioCair BC-65TM Disinfectant Air Purifying Solution (300ml) for Car Use has been mixed with ultra pure water, making it a hassle free experience! Just pour in the solution, plug and play! One packet of the 300ml solution is great for 10 hours and the solution can be left in the car for up to 30 days once open.

If you can relate to one of the below, perhaps you would like to consider getting the BioCair’s Ultimate Automobile Aerial Disinfection bundle to protect yourself and your family:-
- Often visit crowded places or work in high risks environment (e.g. healthcare, construction or other essential industry)
- Often ferry friends / passengers who are not from the same household
- Ferrying family members who are unwell to clinic / doctors

Quote “SERENE20” to get 20% off Ultimate Automobile Aerial Disinfection Bundle https://biocairsg.com/collections/air-care-for-care/products/ultimate-automobile-aerial-disinfection-bundle , usual price $95, launch price $80.75, now $76 only for our readers, valid till 31 August 2020.
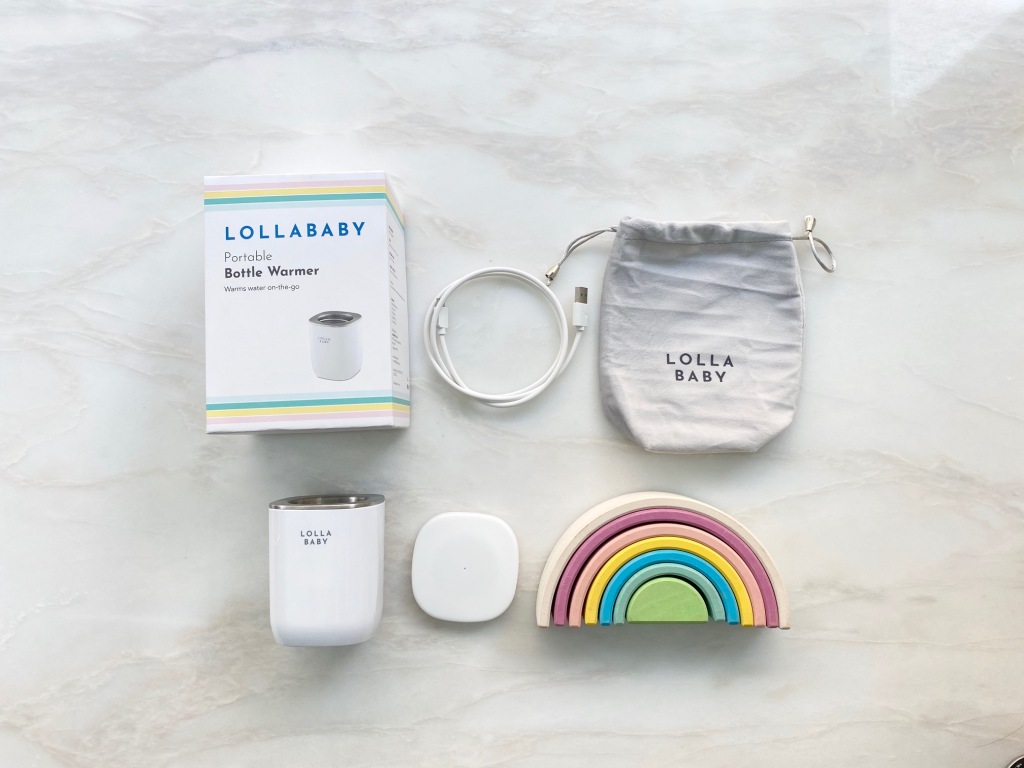
[Review Post] Lollababy Portable Bottle Warmer a lifesaver for parents on the go!

Avery is blessed to enjoy my sister’s frozen breast milk for the last 6-7 months but the problem with frozen breastmilk is that it can be cumbersome to bring out and warm up on the go. We often have to rely on the traditional method of bringing out hot water in a thermal flask which can be challenging when on the move!
Thankful for Lollababy who has come out with this brilliant idea of creating a portable bottle warmer to save parents from the hassle! Its single button design is simple to use and with one full charge, it can heat up and warm up milk 2-6 times. I love that it is mess-free, portable, and beautifully designed with a modern digital display. The quick heating feature allows chilled milk to be heated up in less than 10 minutes.
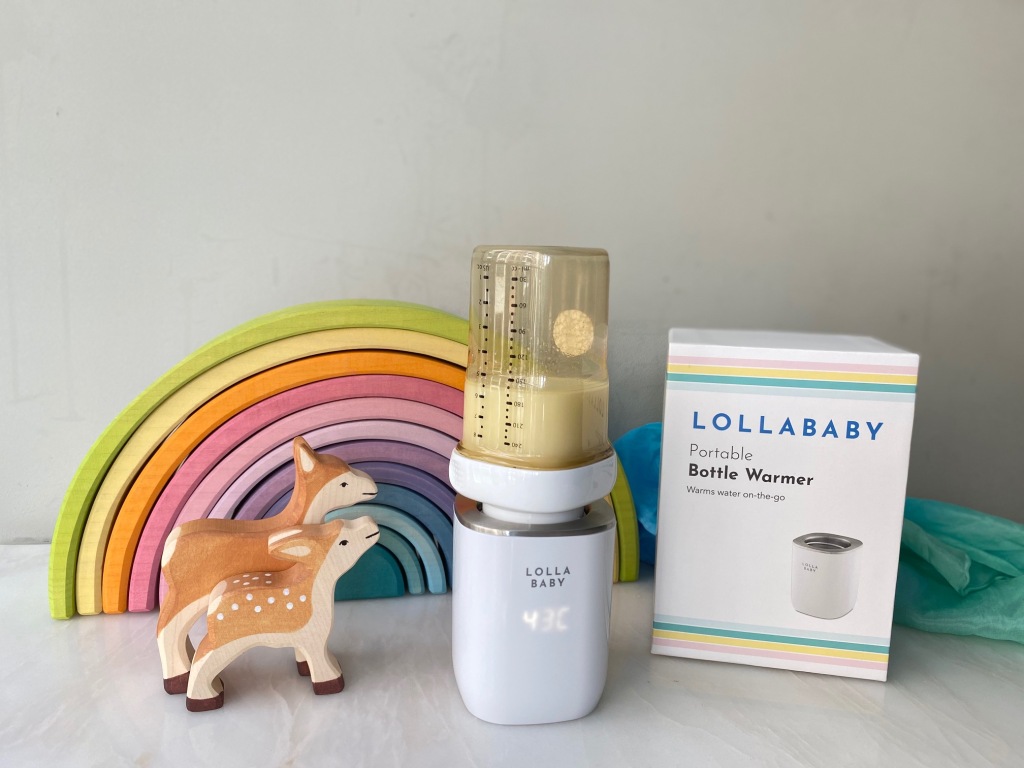
This bottle warmer has four temperature settings to choose from; 37°C, 40°C, 45°C, and 50°C. This prevents overheating of breastmilk which kills off all the nutrients. The temperature setting is thoughtfully designed this way because the perfect temperature to serve breastmilk is at 37°C or not warmer than 40°C!
The Lollababy Bottle Warmer is also compatible with most wide-neck baby bottle brands – otherwise you can conveniently purchase bottle adapters from @lollababysg too! Mama is using Hegen bottles and we are using the Hegen PCTO™ Wide Neck Adapter which we purchased directly from Hegen.
Mummies who wish to grab this bottle warmer can purchase directly from Lollababy’s website (https://www.lollababy.com.sg/), or check out @mummys_market massive online sale happening from now till 25 May, 2359hrs!
#Lollababy #NewLollaNewLook
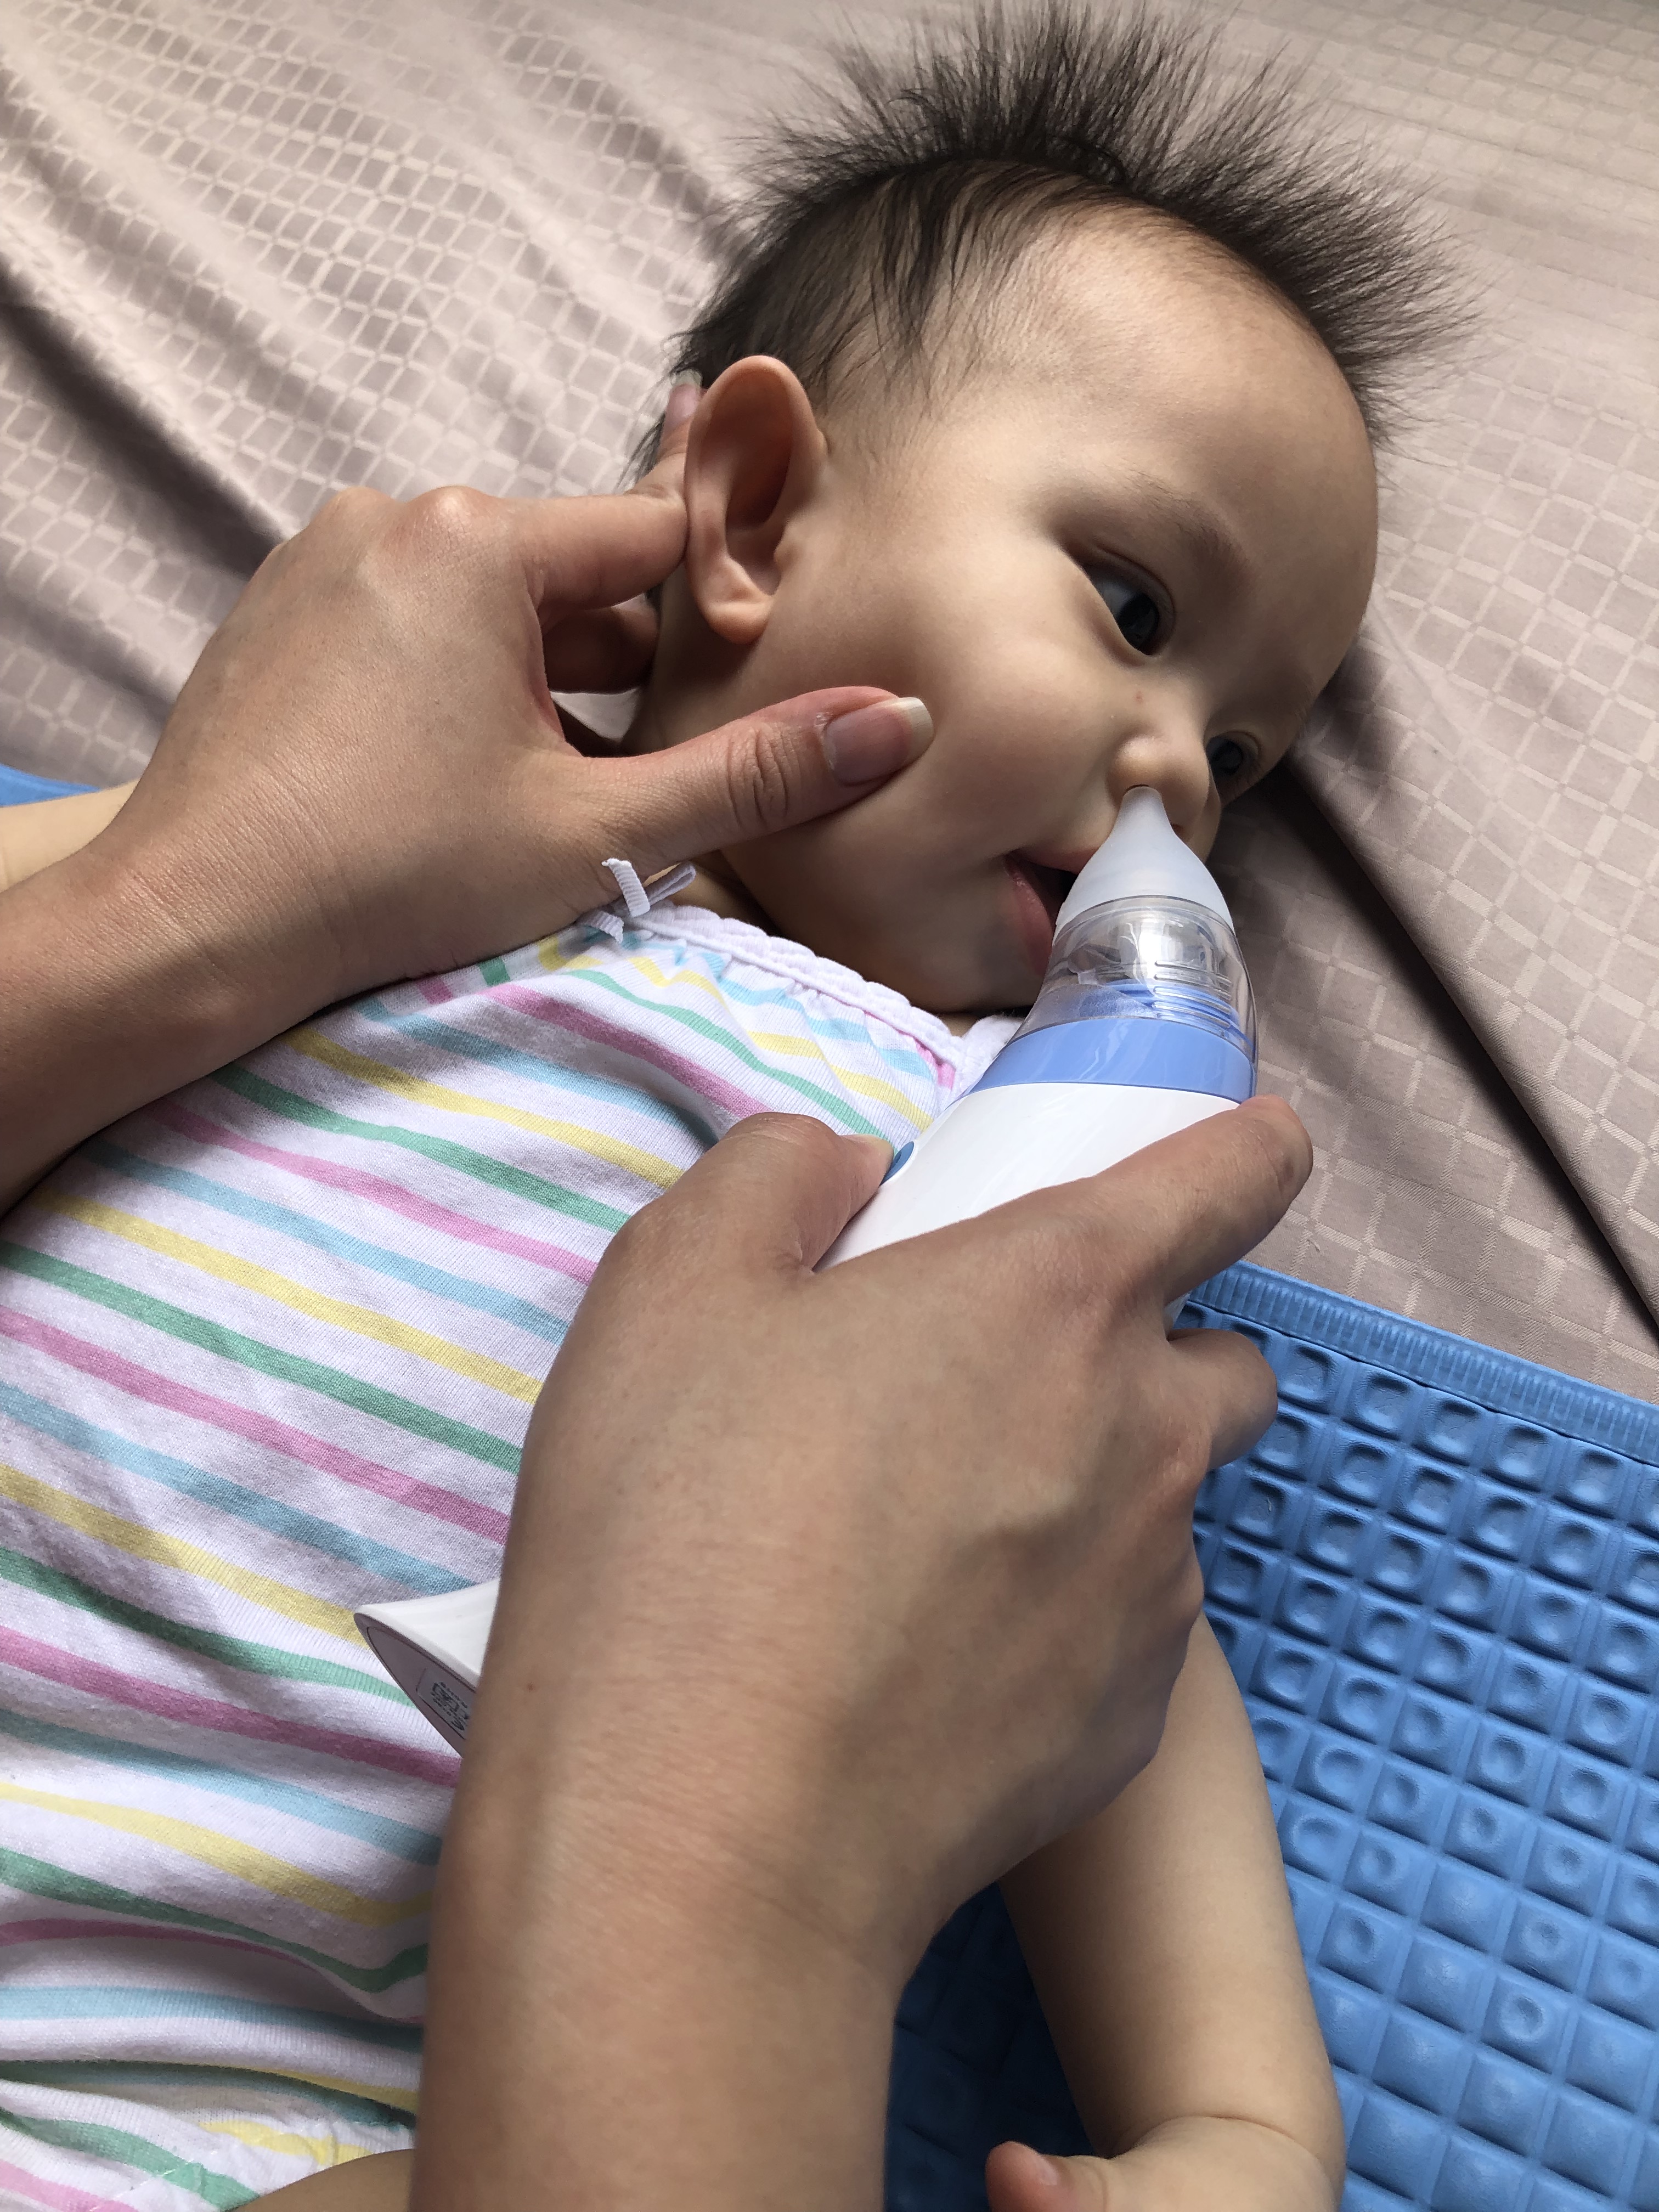
[Review Post] Lollababy Nasal Aspirator effectively removes mucus with the use of Sterimar Nasal Spray

Mama bought Lollababy Nasal Aspirator when Baby Avery caught her first flu at five months old. At that time, Baby Avery was too young for any oral medication so Mama got Sterimar Nasal Spray and iliadin nose drop over the pharmacy counter. Clueless on the effective use of the nasal spray alongside with the nasal aspirator, both Papa Chia and I faced a lot of frustration using them. We just can’t effectively suck out the mucus no matter how we tried! It was only until recently when we visited a Pediatrician (PD) that we learnt the proper use of Nasal Aspirator together with Sterimar Nasal Spray and ever since then, it worked really well!
In this review, Mama wanted to share with all Mummies on the tips we learnt from the PD, and here goes:-
- Place baby in an upright sitting position. Gravity will aid in removing the mucus! It also prevent the solution from flowing down their throat. Unknown to us, we always put Baby Avery in a lying position because that was the easiest! If you have to put baby in lying position, do tilt their head to the side to prevent the solution from flowing down their throat.
- When applying Sterimar Nasal Spray, you need to press and hold, and allow the excess solution to flow out. Mama used to only press and let go really quickly, with just a quick “Psst”. But to effectively remove the mucus, we need to press and hold and it should go, “Pssssssssst” until you see excess solution flowing out.
- Finally, use Lollababy Nasal Aspirator to gently and steadily remove baby’s mucus through suction.
 [Put baby on upright seating position to apply Nasal Spray and Lollababy Nasal Aspirator]
 [Tilt head to the side to apply Nasal Spray and Lollababy Nasal Aspirator]
 [Really effective in sucking out mucus!]
The Lollababy Nasal Aspirator comes with soft silicone tips with three sizes (“0-3 Months”, “Power” and “Long reach”) for different suction strengths. Baby Avery started with “0-3 Months” silicone tip and now we are using “Power” silicone tip for Baby Avery at nine months old. I also love that it is ergonomically design for ease of grip and control, it is also compact and lightweight and stands upright for easy storage. It is waterproof and easy to wash as well! Mama washes the mucus cap and silicone tips by rinsing them under water and milk bottle cleanser!
All Mummies can use the Lollababy Nasal Aspirator with a peace of mind because it is of medical-grade quality and approved by the Singapore Health Sciences Authority and FDA. It is also BPA- and latex-free.
You can get them right here:-
https://www.lollababy.com.sg/product/nasal-aspirator
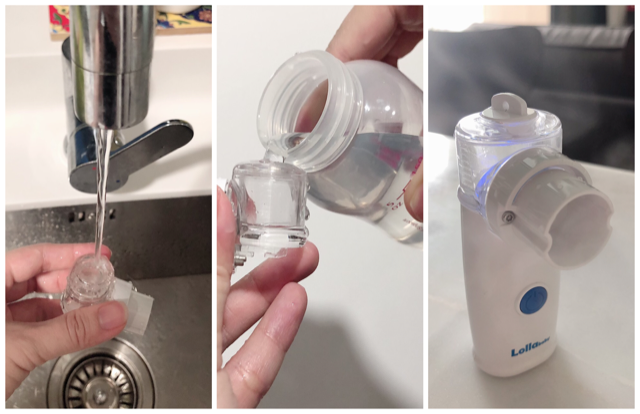
[Review Post] Lollababy Portable Nebulizer a lifesaver
Avery is currently down with viral flu and Mama took leave for the last 2 days to keep her at home so that I can administer her with nebulizer every 4 – 6 hours. After the visit to the Pediatrician, we went home with a rented nebulizer machine (we were charged $10 per day, which is pretty common) and Baby Avery was prescribed Pulmicort Respules, Berodual Solution and Sodium Chloride to be manually mixed and used with the nebulizer. This will helped loosen Baby Avery’s phlegm and mucus to be purge or suck out later.
Can you imagine how stressed up we were as first time parents? It doesn’t help that the rented nebulizer was loud and bulky, the long tube and wire cord were all over the place! After a while, Baby Avery woke up crying because of the noise and started twisting and turning while grabbing on to the mask and pulling the tube. It was legit nightmare.
 [The bulky and noisy rented nebulizer which has tube and wire cord all over.]
And that is not all, the worst feature of the rented nebulizer is that it can only effectively dispense out the solution in an upright position and it does not come with any indication to show if the solution is fully dispensed. We started shaking it and second guessing in the dark if the solution has been completed and had to turn on the night light to check. Gosh, it was such a hassle.
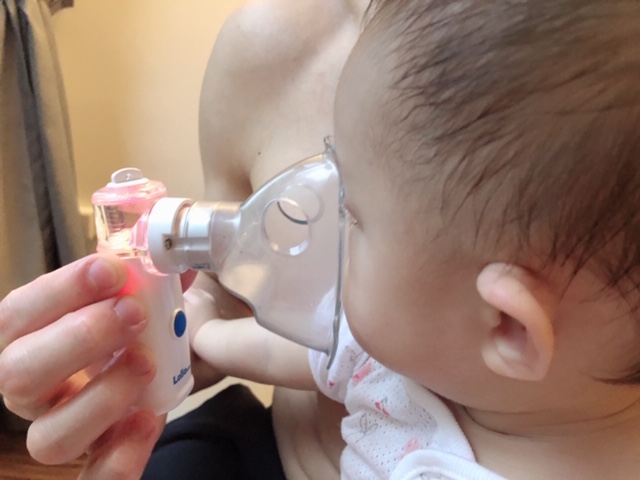
Thankfully for the portable nebulizer brought over by the kind folks from @lollababy.com.sg, after a quick briefing, we switched to use that immediately!
 [Lollababy’s portable nebulizer is so compact and light!]
 [The portable nebulizer is so quiet that Baby Avery continues sleeping while Papa Mama administer the nebulizer! It effectively releases the solution even when lying down!]
 [Little fuss from Baby Avery when Papa Chia administer the nebulizer. ]
The portable nebulizer, as its name suggests, is really portable and compact! There is no loose wire or tube, run on two “AAA” batteries and is really quiet! We love that it also comes with a light indicator which turns red once the solution runs out. We realized that after using both the rented nebulizer and the portable one from @lollababy.com.sg, both of them took about the same time of around 12-15 mins to dispense 2ml of solution. In fact, we saved some time using the portable nebulizer because we don’t have to keep shaking it and second guessing if the solution runs out.
 [Red light indicator comes out once done.]
The micromesh in the portable nebulizer can last approx. 1350 mins which is approximately 90 times of 15 mins usage. I was told that many of the portable nebulizer goes wonky even before that because Mummies and Daddies forget to wash them before stowing them away after use! The cleaning of the nebulizer is pretty simple.
Here are some simple steps to follow to make sure that your portable nebulizer lasts a long time!
- Detach the medication cap and rinse it under tap water after use
- Fill the medication cap with 2 – 3 ml of warm water and attach it back to the nebulizer main unit
- Let it run till the water runs out and air dry before keeping it
It is the flu season now and this is such a lifesaver! Would highly recommend Mummies and Daddies to go get one!
You can get them right here:-
https://www.lollababy.com.sg/product/lollababy-battery-operated-portable-micromesh-nebulizer/
[Review] Transiting to Love to Dream Swaddle Up Transition Bag was a breeze!

It has been more than a month since we transited Avery to Love To Dream Swaddle UP™ 50/50 (Stage 2) (recently renamed as Swaddle Up Transition bag) and she is happy as ever even with her arms freed! When Avery turned 5 months old, we noticed that she has lost most of her Moro reflex and is rolling a lot more. That is when we realised it is time to remove her wings to make sure that she can push herself over when she flipped in the middle of the night. With her wings unzipped, there will then be no risk of suffocating as her arms are right there!

Mama loves this unique zip-off version as it provides a lot more mileage. She was able to fit into the transition swaddle in size M at three months old and has been using it since!
The Love To Dream Swaddle UP™ Transition bag continues to preserve Avery’s sleep routine and the snug fit design over her torso was able to provide that secure and snuggly feeling for her to continue to sleep well in it!
We love that with the use of Love To Dream Swaddle UP™ swaddle, it replaces the need for blanket. This allowed us to have a peace of mind knowing that she won’t be entangled among the loose blankets especially now that she is rolling and flipping around her cot.

It has been more than three months since Avery started using Love To Dream Swaddle UP™ swaddle and she is enjoying every moment of it! We highly recommends all parents with newborn and parents to be to go get one!

Meanwhile, do checkout bambino.com.sg and use promo code “serenehugs” for 10% storewide discount (valid till 4th August 2019).
[Review] Love to Dream Swaddle Up swaddle a must have!

Avery is not a good sleeper and when our confinement nanny left, we struggled to put her to sleep for close to two months. It took us numerous attempts every night to put her to sleep as she often wakes up the moment we placed her back to cot. Even though many mummies in our October baby group chat recommended Love to Dream swaddle, it just didn’t occur to us that Baby Avery needs it!
The situation worsened when her sleep pattern was disrupted as she turns 3 months old. The whole dance of putting her to sleep dragged on and it took us hours to put her to sleep. The worst is when she can only sleep for an hour or two each time. We were desperate for help and when my mummy friends recommended Love to Dream swaddle again, we had to get it!

On the first night she tried on the swaddle, it was pure magic. She fell asleep on our first attempt in putting her back to cot! After testing it out for 3 successful nights, we went out to buy 2 more! She has been using the Love to dream swaddle for more than a month and we highly recommend all parents with newborn and parents to be to go get one. It is a lifesaver and our only regret was that we didn’t get it earlier.
We noticed that whenever Baby Avery stirs in her sleep, she was able to self soothe herself back to sleep by sucking on her “wings” and gently rubbing her cheeks. This has never happened before! We love that the swaddle is designed with a snug fit over her torso which makes her feels secure and helps calm her natural startle reflex.

The Love to Dream Swaddle Up swaddle comes in various thickness suitable for various environment. We love the bamboo lite version most as it is really soft and smooth! Even I feel like snuggling inside the swaddle if I can fit into one. It being the lightest material is also the most versatile! On warm days, we pair it with sleeveless rompers, at night when we turn on air conditioner, we pair it with long sleeve romper. There are also recommendations and instructions printed on the packaging. With this swaddle, we stopped using blankets at night and this gave us a peace of mind without having to worry that she may get entangled among the loose blankets.

Love to Dream not only makes baby swaddles for infants, but they also have swaddles which can grow with our girl as well. We bought the Love To Dream Swaddle UP™ 50/50 (Stage 2) (now renamed as Swaddle Up Transition bag) which has zip-off wings. This will come in handy once our girl learns to flip as the wings can then be removed to set her hands free!
I will share more of our experience using the transition mode when she starts flipping! Meanwhile, do checkout bambino.com.sg and use promo code “serenehugs” for 10% storewide discount!

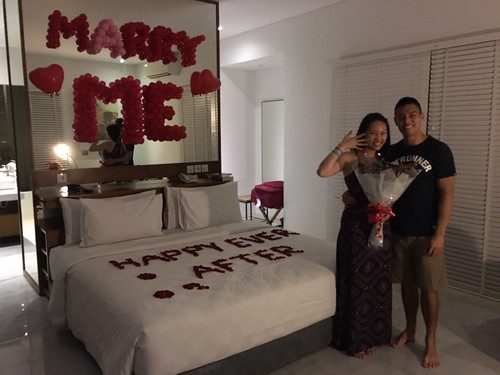
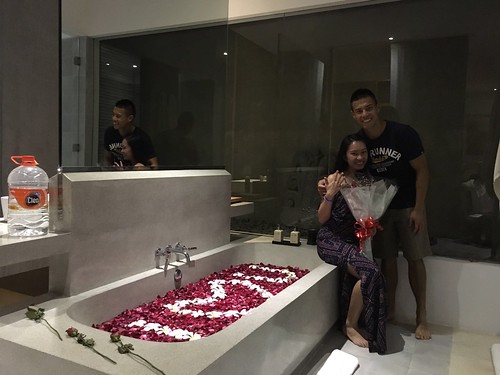
Day 5 of Bali Trip, Part 2, Proposal Day
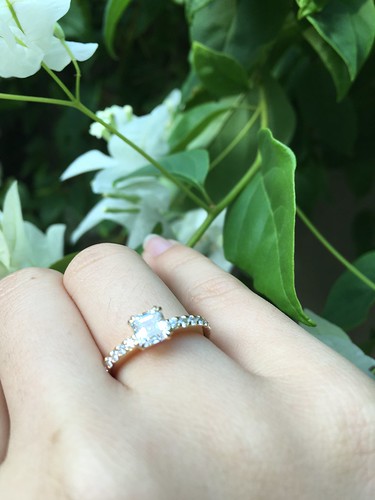
Before our trip, we have already been talking about a suitable date to get married and have booked the hotel banquet as we chance upon a good deal. So technically speaking, the proposal was long overdue.
When the Bali trip comes, I had an inkling that he may proposed but am also wondering if he had the time to get the engagement ring customized. Before the trip, I imagine that if he were to propose, it will be great that if he will propose at the summit of Mount Batur (which thankfully he didn’t!) and when it didn’t happen, I didn’t think much of it thereafter.
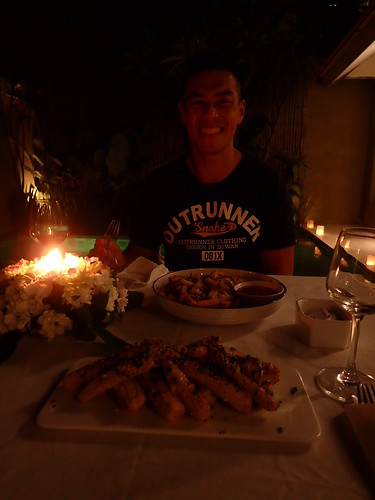
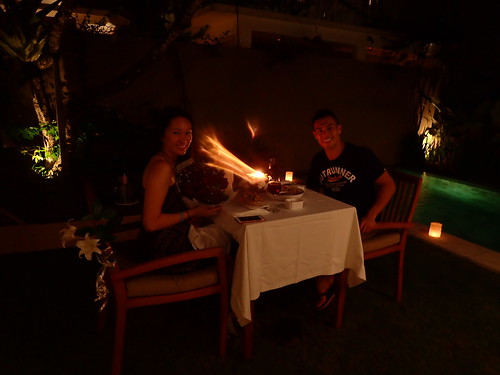
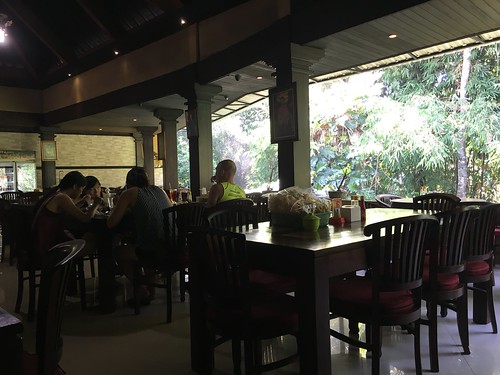
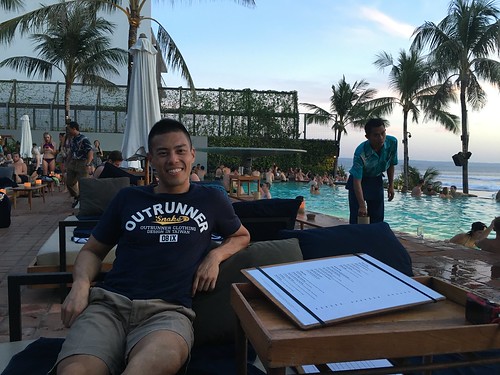
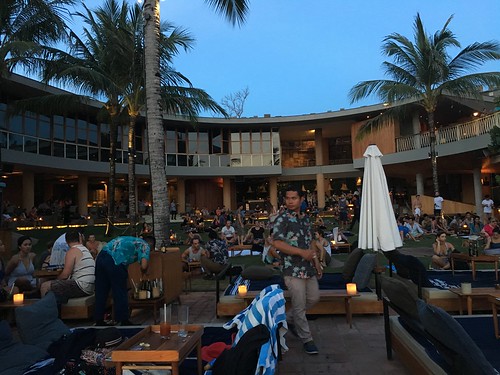
So as shared in previous post, we left Ubud early and had an early lunch at Ibu Oka. We ordered one plate to share and when we check in to our villa, he complained that he is not hungry and his stomach feels bloated. He suggested to grab a light meal nearby instead of going to Potato head for dinner. I was really puzzled as he only ate 2 – 3 bites of the babi guning, how can he be full? It was our only free evening in Seminyak to visit Potato Head, so I half pleaded and half coerced him to go instead..
When we were at the gate of the Potato Head Beach Club, he was half hoping that we won’t be let in. To his dismay, we got a front row seat and had to spend $50 on food. So we ordered a burger with fries, a side and a drink to share as he wasn’t hungry. While eating, he didn’t eat much and me the hungry one ate most of the food and almost all the fries. He kept asking me to stop eating the fries which I found really annoying. Never did I know… back in the villa, he had something prepared for us. Haha.

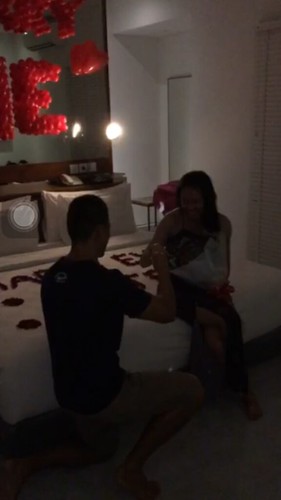
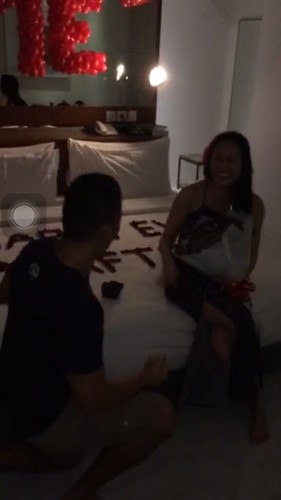
So the room was really dark and not ideal for photo taking and after the proposal, there was a three course meal for both of us and a huge plate of truffle fries waiting for me! We just kept laughing as we recall back the events for the day while I was really kicking myself for insisting on going to Potato Head. We wasted a lot of food that night.


Day 5 of Bali Trip,Part 1
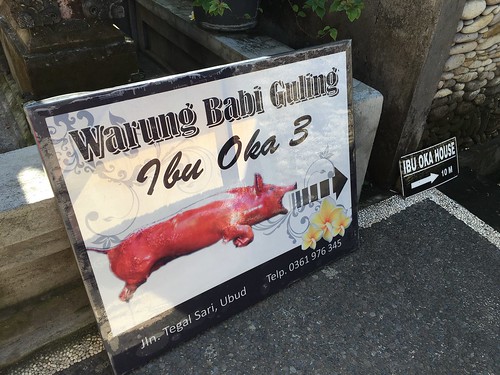
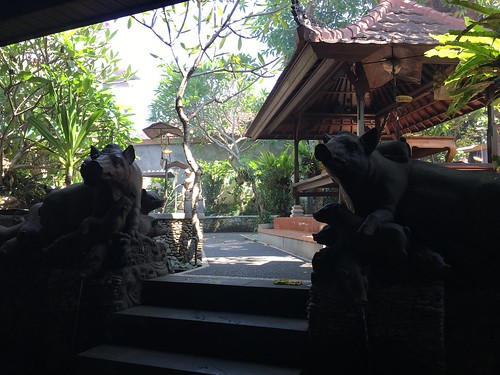
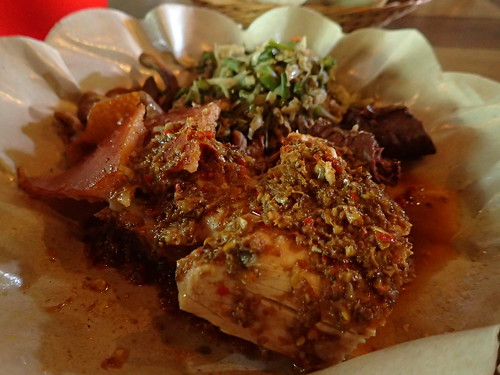
On the fifth day of Bali, we check out of our hotel at Ubud and had an early lunch at Ibu Oka for their fame Warang Babi Guling. The environment of this branch is great, huge and comfortable, and if you are curious, you can also asked to see how they roast their pork.
We ordered one to share as it was too early for lunch and we were more amazed by the whole roasting process then the food itself. But the crispy pork crackling and spicy pork are great!
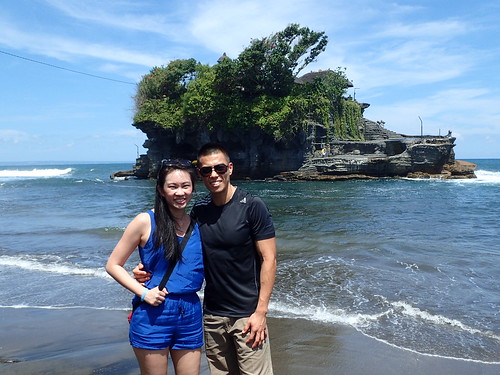
We then leave Ubud and travel towards Semiyak, but before that, we also dropped by Tanah Lot. Before visiting Bali, we were deliberating if we should visit this temple. There are many myths and rumors of it being a cursed temple where unmarried couples will break up within 6 months of visiting the temple. But when I try to find out more information from my driver guide, he didn’t know of this curse. To the locals, this temple is there to protect the fishermen. So off we went and it has being 8 months and we are now busy preparing for our wedding! When we visited, we went during high tide and were unable to cross over to the temple.
We then head over to Seminyak and check in to our villa. We love the villa we stayed and it deserves a post on it’s own! We then rested for a while before walking to Potato Head Beach Club, it is a 20 minutes walk to Potato Head and we went there without knowing that we had to make a reservation. In the end, we pleaded with the guard to let us in, told him the sob story of us being really hungry, walked 20 minutes from our hotel and gave him our huge pitiful eye look, and it worked! He let us in to let us to ask their concierge if there are available tables for us. God must be watching us as we got the first row day bed seats for a minimum spend of $50! Woot!

Front row day bed seats! Woohoo!
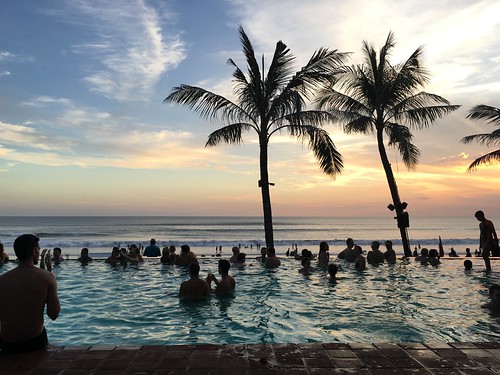
We had an awesome view of the sunset!


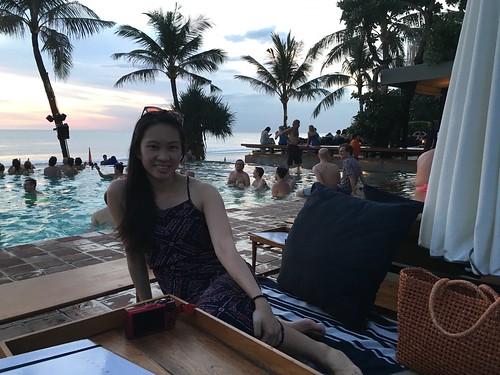
The food wasn’t too bad but by the time they served the food, it was dark and we couldn’t quite see what we are eating. Haha.
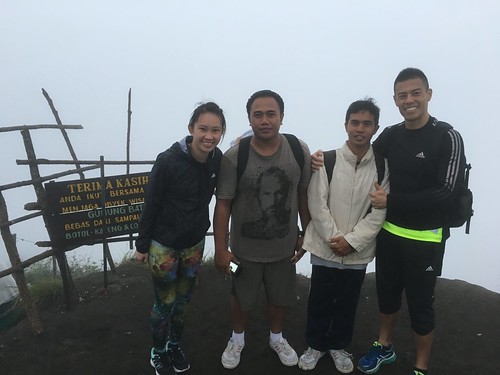
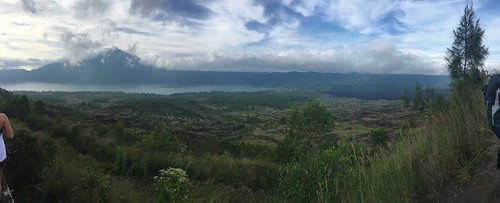
Day 4 of Bali Trip, Climbing up Mount Batur
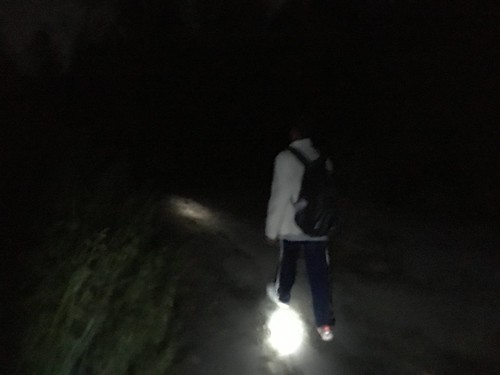
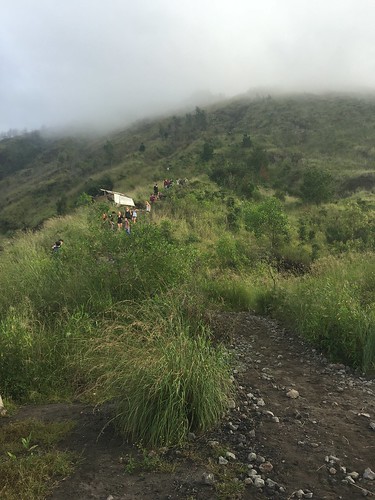
On the fourth day of our Bali Trip, we woke up slightly past midnight to prepare for our sunrise climb up Mount Batur – an active volcano. Once we reach the starting point of the climb, our Bali driver guide Bagus from Beat Bali Adventure, found a local hiking guide and off we go. Hiking in complete darkness with the path illuminated by nothing more than our flashlights, we were excited and filled with energy.

The first hour of the hike was the easiest part of the climb as the path was generally flat, we also had a quick break at the beginning where the guide will stop for a prayer and offering session to ask for safety and smooth journey during our time on Mount Batur.
Both Bagus and our hiking guide prepared some offerings and offered their prayers on our behalf. Soon after, the real hiking began. Along the way, we saw people of all age and sizes. There were the seasoned climbers armed with hiking sticks, the determined retirees in their 50s and 60s and the fearless youths in their shorts and t-shirts.
Most of the tourists we spotted are largely Caucasians and we only bumped into a group of Malaysian while climbing up. We reckon that most of the Asian tourists in Bali will opt for the beach than the climb.
There are many types of hiking groups as well. We saw a large group of 6 to 8, climbing with 1 guide and there were also another group of 10 – 15 with 2 guides. We were thankful to get the best deal! We have 1 hiking guide all to ourselves and Bagus who decided to sweat it out with us and boy were we thankful to pay for the slight premium! The hiking guide is my lifesaver, he practically hand held me up and down the climb while I trip and tumble along.
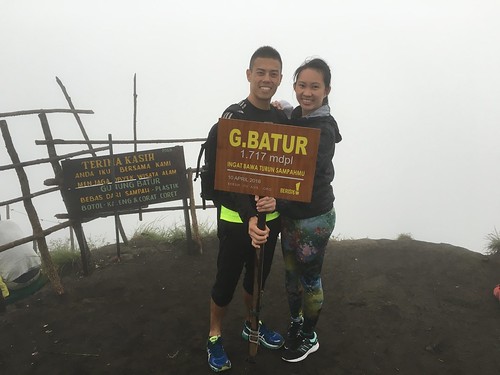
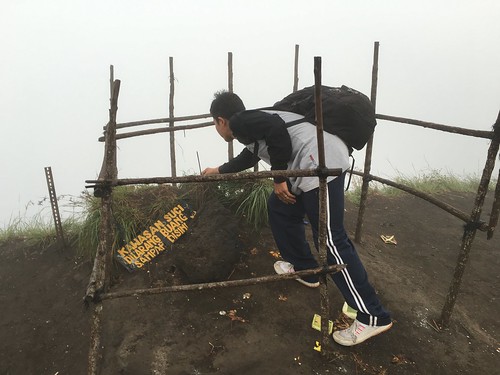
When we finally reached the submit, it was pitch dark with howling wind and drizzling rain. We huddled in a hut and ate the egg sandwich which Bagus prepared and brought it up for us. When the sun is up, we didn’t managed to enjoy the sunrise with the thick fog and rain, but we were nonetheless thrilled to have reach the top!
Our guide gave some offering to thank the God for their protection.

My happy face when the sun is up, not knowing the greater challenge before us with the climb down.


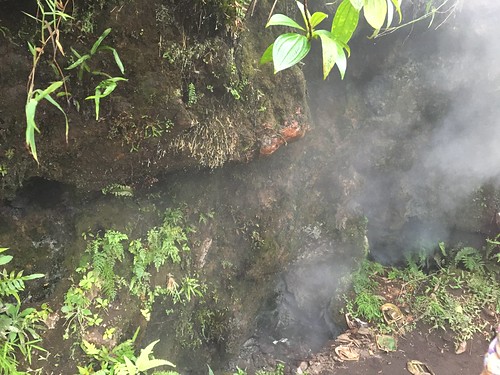
There are hot steam coming right out of the rocks!
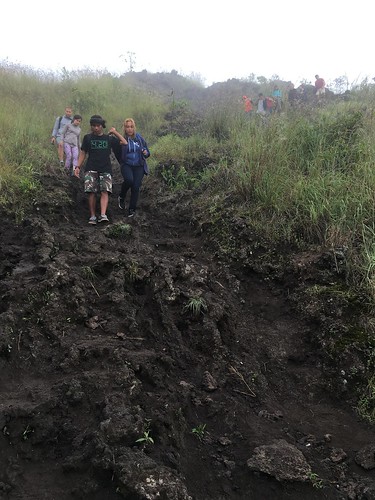
The way down was the worst! I practically screamed and grabbed the hand of the guide while sliding down the sandy volcanic sand. There were plenty of loose rocks and pebbles and it was really steep. My better half slipped and fell 5 times while making his way down. Poor him and his butt got to sacrifice as the hiking guide had all his attention on me.
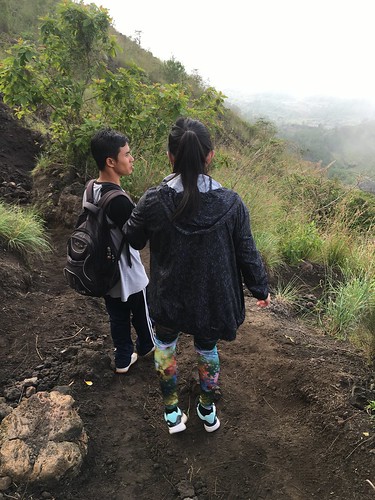
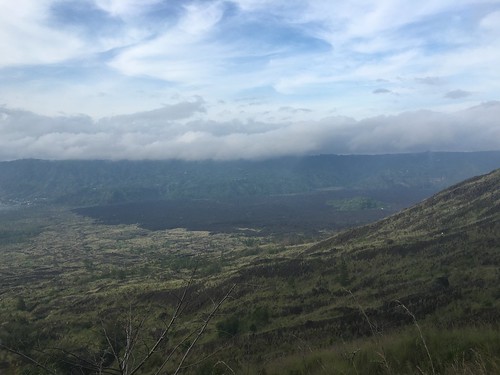
But we were rewarded with beautiful views as the fogs cleared.
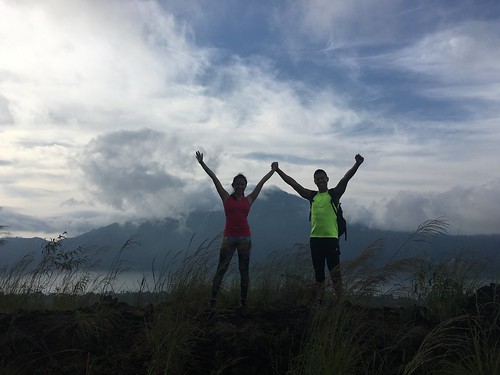

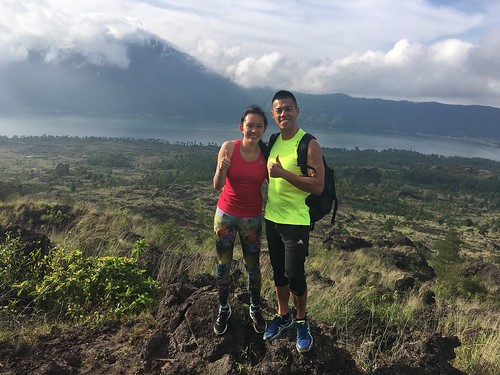
Will I ever climb up Mount Batur again? Definitely no. But should everyone give it a try? Oh Yes! After the climb, you will feel like you can overcome anything that comes your way! The guide was also really proud of me! Even though I was going really slowly with all his help, we made it up steadily with little breaks in between!
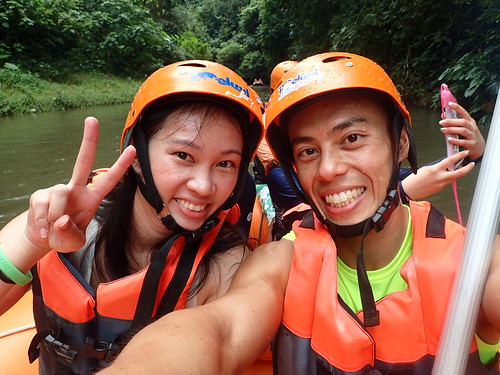
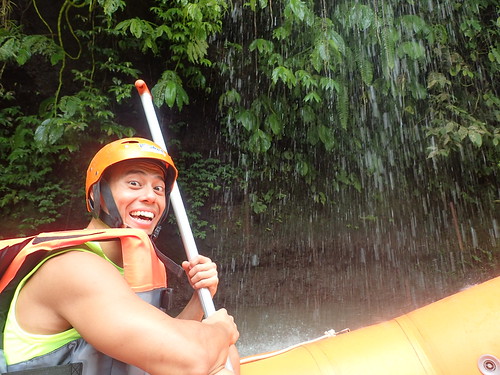
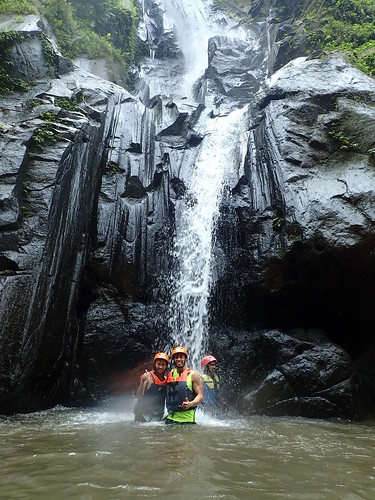
Day 3 of Bali Trip, White Water Rafting & Yoga
After a day of Cultural tour, we went on a little adventure in Ubud. We started the day with White Water rafting which is, to be honest, not as exciting as I imagine it to be. The walk down to the river banks was the most tedious as the steps were slippery and steep. Thereafter, it was more of a river cruise with occasional rapids in between. We are so going to try the more thrilling white water rafting in New Zealand next year!
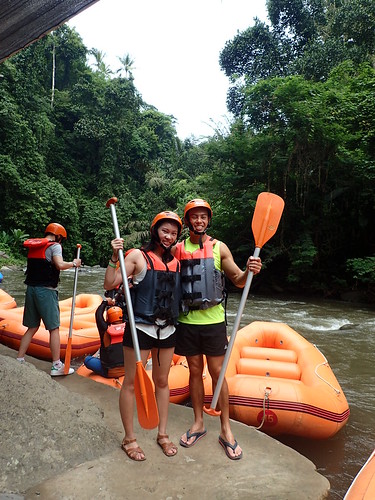
It was nonetheless a refreshing and wet experience to get away from the heat.
Drama King. Haha. We saw some people doing river tubing where you have an individual floating down the river sitting on a floating tube. A few of them flipped over and we saw one got stuck between rocks. One of them even fell off the tube and starting floating quickly down the river. It was a scary sight and thankfully the guy was saved by one of the guides on a raft! He must have drunk a whole bucket of water!

Thankfully I brought my trusty waterproof camera along.
Look a quick dip in the water much to the dismay of my clean freak partner. A simple lunch buffer was provided but we saved our stomach for finger linking good BBQ pork ribs at Naughty Nuri’s!
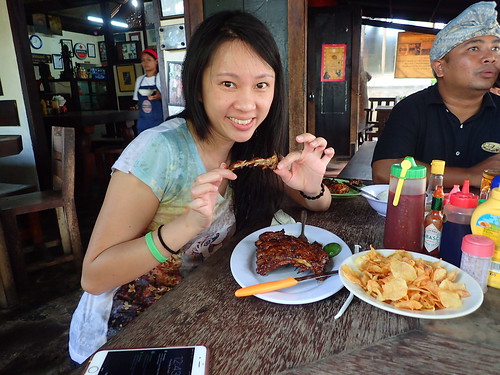
That’s TJ in the background, our driver guide from Beat Bali, joining us for some yummy BBQ food!
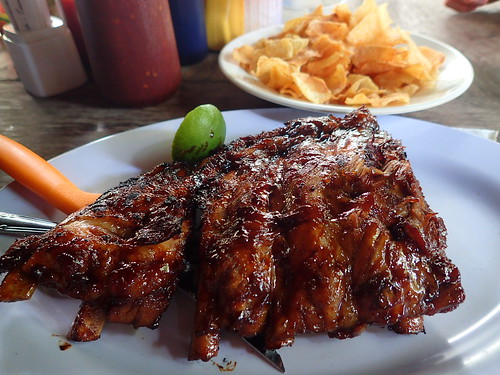
The sauce is tasty with the BBQ meat grilled to perfection and falling off the bone so easily.
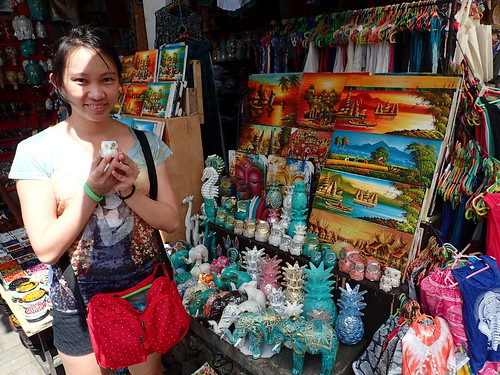
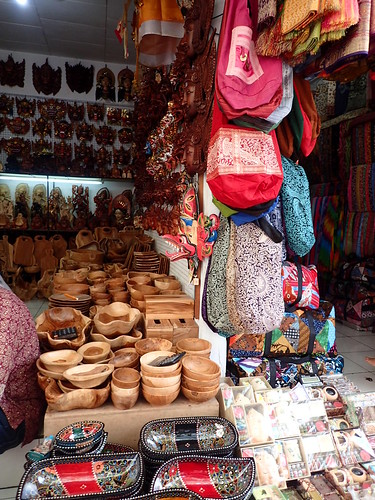
We then toured the Ubud Market and look around at their souvenirs and crafts but regretfully we didn’t bring out much cash for that day. Ended up with a simple wooden carved Omm sign for our new place.

We took a rest at our resort before heading to Yoga Barn for a before dinner yoga session. They allowed walk ins and you can just pay for a single class as a tourist. It can get crowded pretty quickly and you may want to pop in earlier to secure a slot.
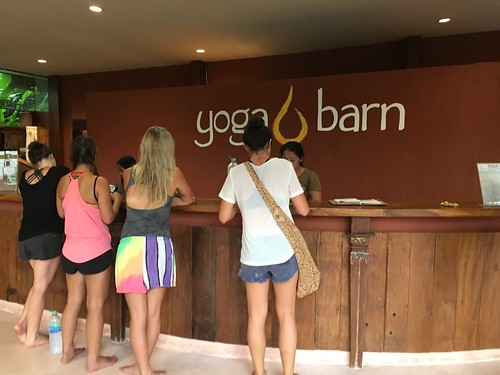
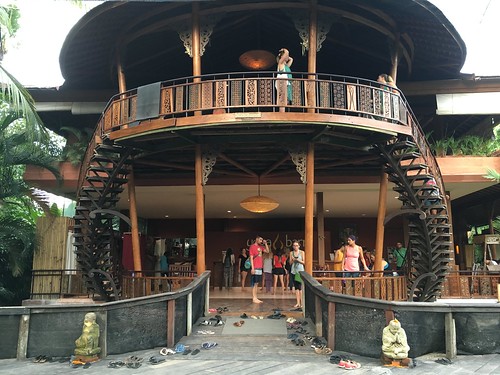

His first yoga session! I love the session at Yoga Barn. Their teacher gave clear instructions and it is always interesting to see people from around the whole, with different mastery levels in a class! You can see some Yoga Guru doing handstands and various balancing pose easily while us struggling to avoid looking like a topsy turvy potato sack. Thankfully the teacher who taught us was very encouraging and gave various tips for the different poses.
Dinner was at Petani which is a short walk from our hotel.

After the climbing up and down steps for white water rafting and yoga session, I ended up with aching legs! We had an early night for our sunrise climb up Mount Batur the next day! Till date I still can’t believe I made it up and down Mount Batur!
Day 2 of Bali, Cultural Tour around Ubud
On the second day of our Bali trip, we engaged Beat Bali’s driver, TJ, who brought us around to see the sights of Ubud.
First stop of the day was Tegalalang Rice Terrace. It is a smaller but nearer Rice Terrace from Ubud and it is the perfect place for some nice photos under the bright morning sun!


There are some decorated platform at the houses facing the rice terrace and anyone can pop by for some pictures and drop a small fee in return for the residents. You can spend as much time here walking up and down the terrace as you like. I saw an adventurous couple walking all the way down the slope.
The next stop, we visited Tirta Empul Temple, the holy spring temple. Locals and tourists alike can participate in the purification process by taking a dip in the water. Each spring represents something and towards the end of the line, is the spring for the dead. So if you are keen to try, do observe and ask around before popping in!
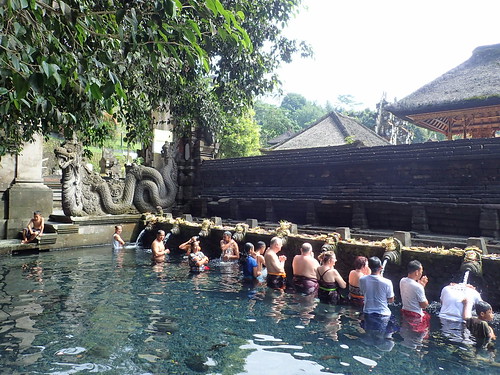
In all of the temples we visited, both the man and ladies will have cover up their legs as a sign of respect. Ladies who are having that time of the month are mostly barred from entering as it is considered unclean.
Day 1 of Bali, Anumana Hotel Ubud
So I’ve finally decided to update my blog with all the travelling I did this year! The last time I shared in this blog was in September 2015 and wow, how time flies! It has been more than a year and with all the travelling (Bali, Taiwan, Batam and India!), proposal and wedding planning, I seriously need to get down to logging the holidays down before I completely forget!
Back in April 2016, we went for on a 7 days 6 night trip to Bali. Yes, almost a week long and there are lots to do other than chilling by the beach or in a villa. It was his first time in Bali and I wanted to let him see some cultural part of it and how it is different from a regular resort island.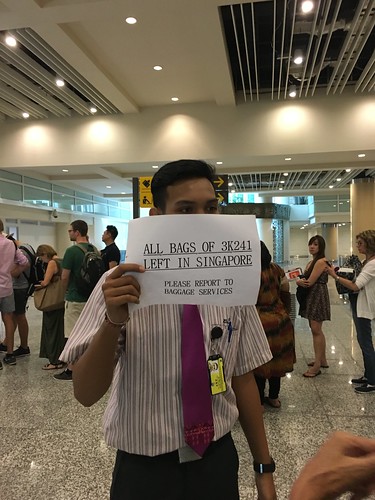
On the first day of our trip, we touched down Bali in the late afternoon and realized that the entire flight’s luggage was left behind in Singapore! So we had to file a report, wasted an hour at the airport just to fill up the form. Our driver, Bagus, whom we booked through Beat Bali Adventure Tour picked us up and brought us to a mall to get the local Data Sim card, which is almost half price compared to the airport. Bagus and TJ from Beat Bali are the best and they came highly recommended from our friends. They speak impeccable English, having many years of experience working in an International Cruise ship, and being Balinese themselves, they were able to share interesting information on their local culture and practices. They were also exceptionally friendly and helpful and we had a great time throughout the trip. On top of our airport transfer on arrival, we also booked our Mount Batur Tour, White Water Rafting, a day tour around Ubud and a day tour around Semiyak with them. We basically co-plan with them our Bali adventure before the trip via Whatsapp.
Upon reaching Ubud, we checked in our hotel and had a quick dinner at the nearby Dirty Duck. The crispy duck was good but wasn’t as fantastic as I remembered. We then headed back to our hotel room and the wait for our luggage continues.

Western Australia Road Trip Tips
In this final post of our Western Australia Road Trip holiday, I will be documenting some of the tips learnt from our trip! Hopefully this will come in as a handy reminder for our future road trips! If you missed out on all the sharing on the sights and attractions, you can find them here.
Let’s begin with some handy tips for your upcoming road trip to Western Australia!
(1) Getting a Data Plan is a no brainer and Optus came highly recommended by many friends! It is affordable and for AU$2 a day, we got 500 MB a day which we never once did exceed the limit. It comes in handy when you need to check the operating hours, address, food recommendations etc during your trip. Both of us bought the SIM card and it was surely useful when we need to make calls to each other and to our AirBnB host to inform them that we are checking in late. More importantly, you can use Google Map which serves as an important backup when your GPS fails, and trust me, there are times when the GPS fails us. When we were driving to the ferry terminal at Fremantle to take the ferry to Rottnest Island, the GPS we rented indicates that our car is in the middle of the sea.

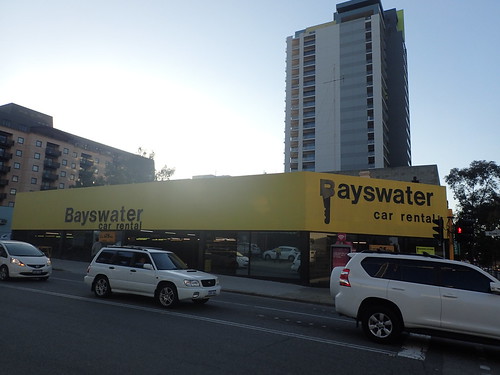
(2) Pick an affordable and reliable Car Rental Company. We booked our car via Baywaters Car Rental (No Birds) also through a friend recommendation. We picked an MPV which is huge and comfortable for long journeys and probably because it is not the most popular choose of car for most couples, the car is very new and clean! No complaints at all and the booking, collection, and return process was easy and fuss free! We rented their GPS for AU$7 a day and also opt in for their Top Cover at AU$7 a day. With the top cover, it means that if you get into any accident, we do not have to pay a single cent. A friend pointed out that if we were to purchase travel insurance (which we did), we actually didn’t have to opt for the Top Cover. Any damages claims would be covered by the insurance! So here’s a reminder to only opt for Top Cover if we didn’t get any travel insurance.
(3) Do bring along your sunglasses as the sun in Australia is way brighter than in Singapore! On most days, it is just clear blue sky with little clouds!
(4) Another reminder for us is to bring a huge selection of songs in MP3 and the cable to connect to the car. Most of the music channels in Australia are playing songs which are unheard of. Probably their local music and after a while, we miss our Mandarin songs!
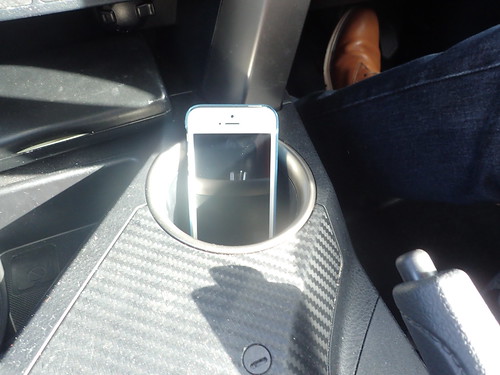
In the end, we listen to our own Singapore’s local radio using internet radio using our phone and put the phone in the cup holder to amplify the music. This we learnt from Uncle Sim’s So Simple Commercial by VISA.
But once we are in the rural freeway, we are basically out in the juggle with no network. Our phone was in SOS mode for hours. We drove in silent for a long while.
(5) Renting a GPS is a must. It is more like a backup plan when Google fails you. You may think that your Google Map can save you, but as mentioned earlier, when you enter their freeway/highway, there is no network at all. Even when we went to Manjinup for truffle hunting, right in the car park, the mobile network was very weak.
(6) Do bring lots of mobile portable chargers or one with huge capacity. We initially brought the mobile charger plug which we can plug into the car to charge our phone. But we soon realized that we need the plug source to keep our GPS alive. Thankfully we brought along 3 portable chargers for this trip. Before going to bed every night, we got to charge 2 phones, 2 iPads, 1 camera and 3 portable chargers.
(7) Do stock up on water and snacks on the first day of the trip. The journeys are between 2 to 4 hours on most days and sometimes we had late lunches!
(8) Do pee whenever you see public toilet and I’m not kidding. Public toilet is hard to come by especially when you are driving in the middle of the forest. Of course if you don’t mind peeing in public, I don’t think anyone will stop you, but we didn’t try that. There was once our bladder almost burst and it was frustrating hunting down a toilet. 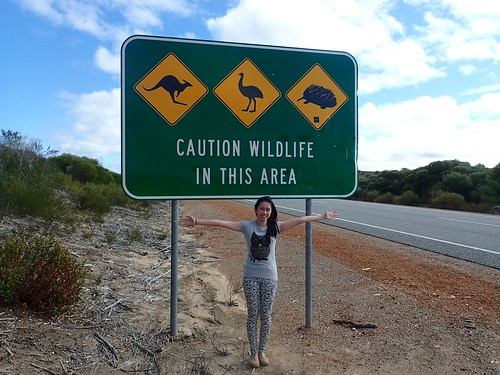
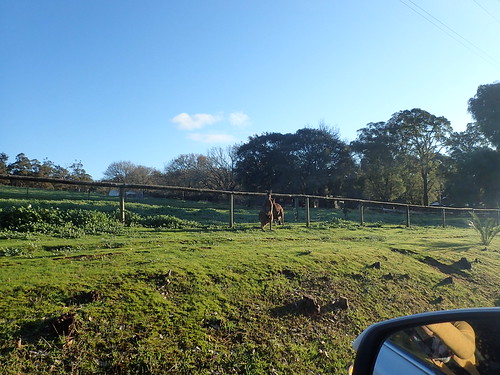
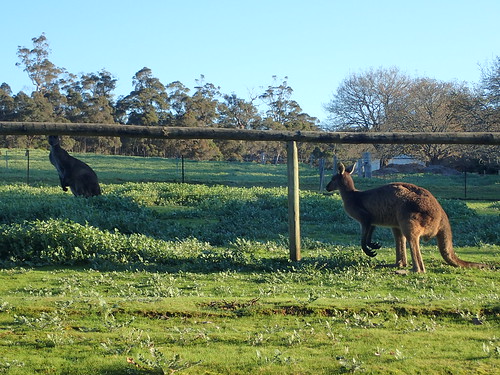
(9) Do watch out for animals! We saw 5 dead Kangaroos and hit a bird during our trip and had a close encounter where we were seconds away from hitting a kangaroo which appeared out of no where. These kangaroo seems to be on suicidal mode! There were a few gory scenes were we saw a headless kangaroo and another with lots of blood on the ground. The bird we hit was a case of unfortunate event. To avoid the bird, we swerved to the next lane but the bird did the same to avoid us. We heard a thud and the rest was history.
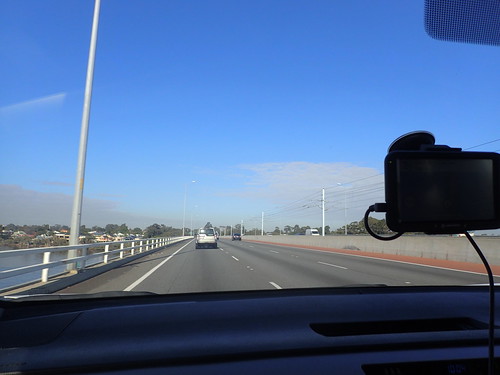
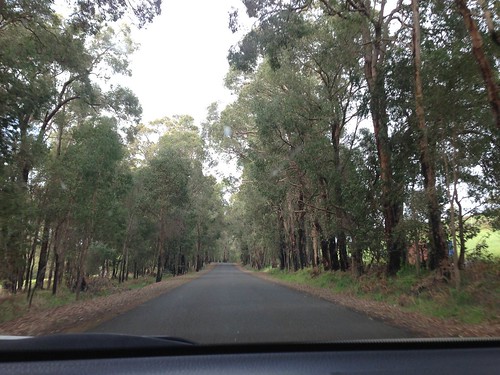
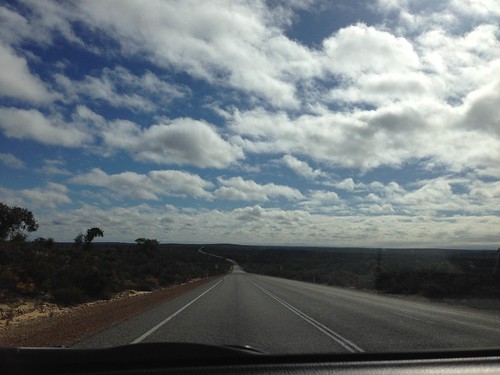
(10) Do not attempt to drive at night. The sun set pretty early in Winter and around 5pm, it starts getting dark. If you must drive at night, try to only drive around in their town. We planned it in a way that we will reach our resting stop by 5pm and only drive out to their town to buy groceries.
Can you imagine driving at night while crossing towns on their highway. Look at the picture below, did you see any street lights? When we walk out of our apartment in Margaret River wanting to empty our bin, it was pitch dark. We quickly turned right in after 3 seconds. City dwellers like us took a long while to get used to such darkness.
With that, I hope you will have a safe and enjoyable road trip! This is our sad face after returning our car! Can’t wait for our next road trip!

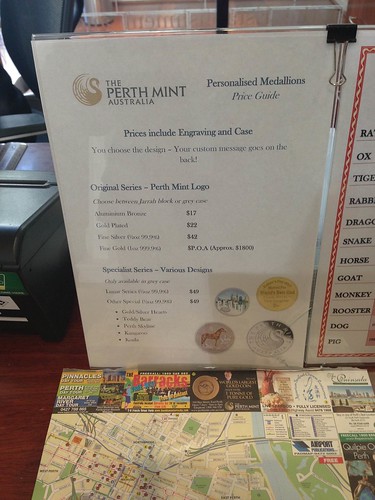
Day 12 of Western Australia Trip, Perth Mint Part 2: Souvenior Shop and Bullion Desk
In this second post on Perth Mint, I will be sharing on some sneaky pictures I took inside the Gift Shops and the Jewelry and Bullion Shop. If you have read the first post, you would have known that there is a strictly no photography policy in the Perth Mint.
After reading on Tripadvisor, I got to know that there are many interesting gifts and souveniors sold in Perth Mint but there were very little shared online. So for the benefits of my shopaholic friends who wishes to know what’s selling at the Perth Mint, where you can pick up some interesting gifts, I took some sneaky pictures. Please pardon the blur pictures!
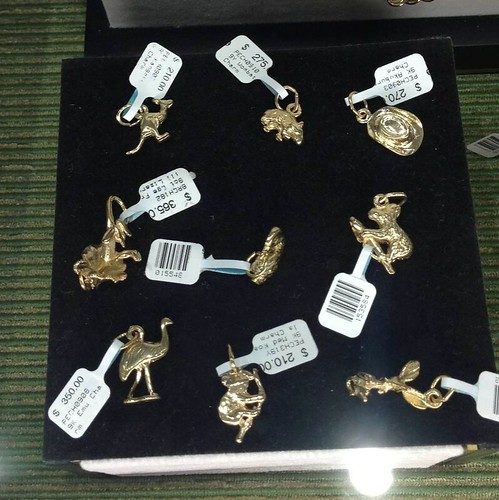
The Souvenir Gift Shop
At the right side of the building, there is a room where souvenirs are sold. Over here, the souvenirs are generally more affordable and this area is not heavily guarded.
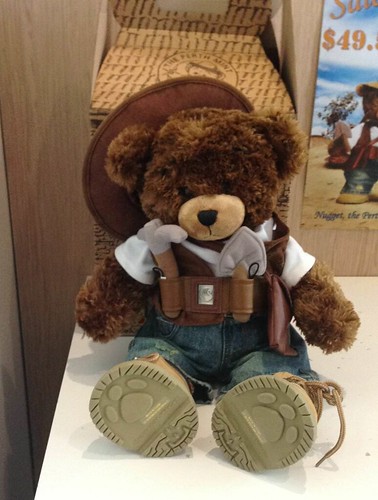 This cute little Prospector Bear is great for the little ones.
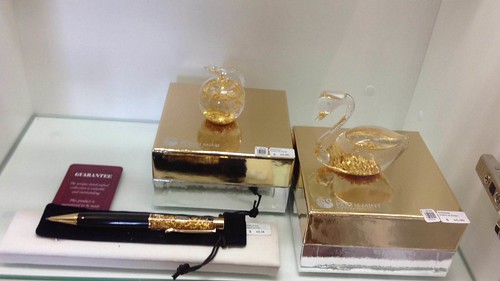
There is also pretty paperweight and pen for your office colleagues or bosses.
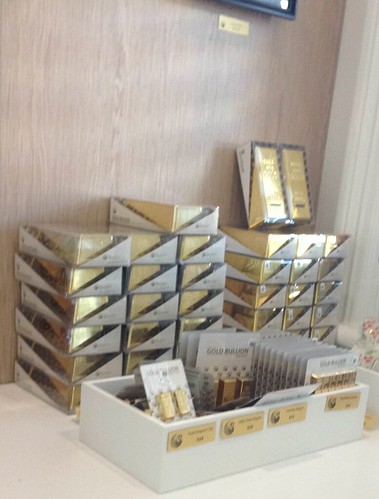
Coin banks and other stationary in the shape of Gold Bars. There are a lot more which I couldn’t take any pictures of without arousing the suspicion of the retail staff. Silver and Gold Coins Retail Section Other than the boring coins like those Zodiac Ones or Commemorative of SG50 ones which is usually seen in Singapore Mint, Perth mint has got many interesting ones which appeals to young at heart like us!
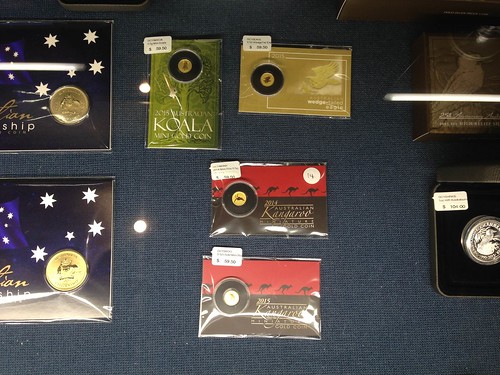
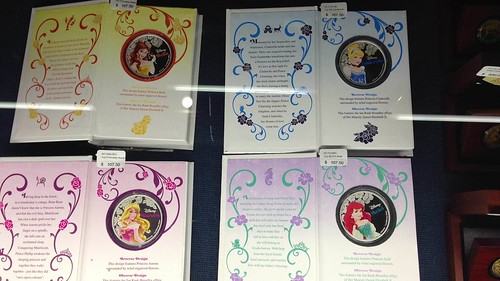
If I have a daughter I will get the Princess Ariel one for her! So pretty!
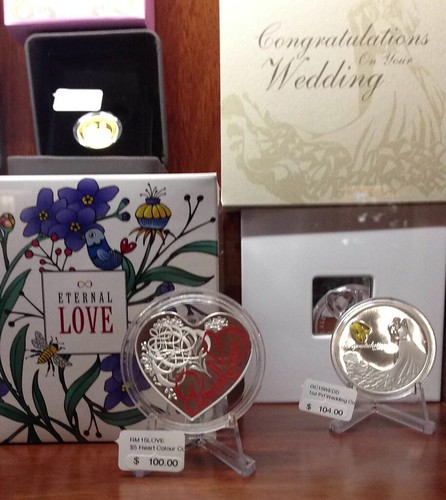
And if you have any friends or love ones getting married, you can also get these! Nice!
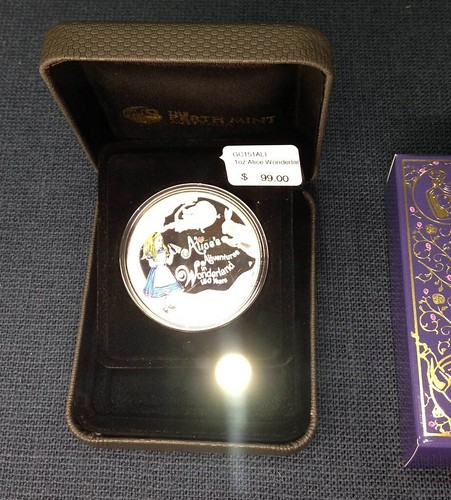
These Alice in the Wonderland ones are lovely as well! For the full coin collection, you can also check it out on their website.
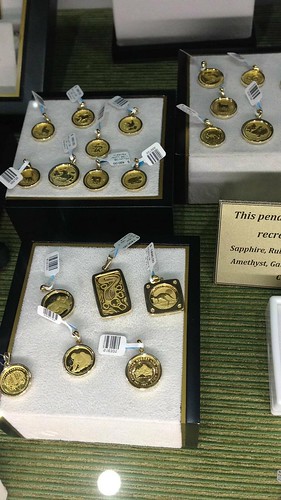
Jewelry Store
On the left side of the building is where all the expensive jewelries are sold. Over here, it is guarded with a few uniform guards and staffs. For overseas visitors, there are Tax-Free Shopping at the jewelry shop if you spend $300 or more. Do bring along your passport and travel ticket.
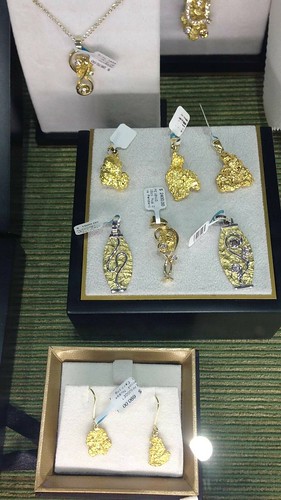
There are also natural gold nuggets for sale! 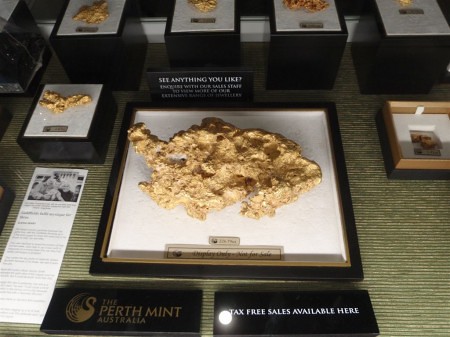
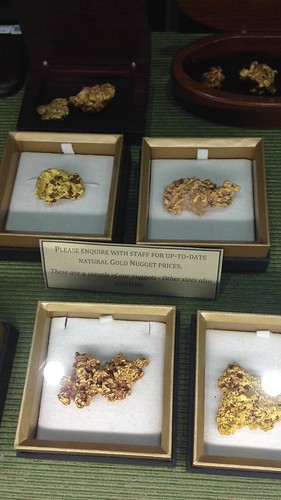

Other than these, there are also pink diamonds for sale but there are really really expensive. You can also can the bullion coins at the jewelry stores.
Bullion Desk
Inside the jewelry store and at the corner of the room, there is another small room where people can buy bullion bars or sell their gold bars/coins or jewelry. There is a screen outside the room where they should the live price of each item and the estimated live price of the bullion bars and coins are also listed in their website here.
Before I went to Perth, I’ve emailed and asked the Perth Mint on some procedures on buying gold bars there as a tourist and here are some information if you are planning to get them too!
Payment will be via Cash at the Bullion Desk as they do not accept credit cards for bullion bars. However they do take credit card for bullion coins up to AU$1000 and certain surcharges apply depending on the products you purchase.
For any bullion purchase over AU$5000 (accumulatively), they require a valid driver’s licence showing your photo, signature and current residential address. Should you not hold a driver’s licence, a valid passport or Proof of Age card, together with a utility bill in your name showing your current residential address, issued less than 3 months ago. This is to comply with AML/CTF laws in Australia as regulated by The Anti-Money Laundering and Counter-Terrorism Financing Act 2006.
The operating hours of the Bullion Desk are Monday to Friday (excluding Public Holidays) between 9am to 5pm. So even though the Perth Mint Tours are available on weekend / Public Holiday, the Bullion desk will not be open.


The buying process is not sexy at all, even though I was really excited with the purchase, it is more like going to a bank. You get seated, tell them what you want through the glass panel, hand over the cash, they hand over the bar and a A4 receipt in a paper bag.
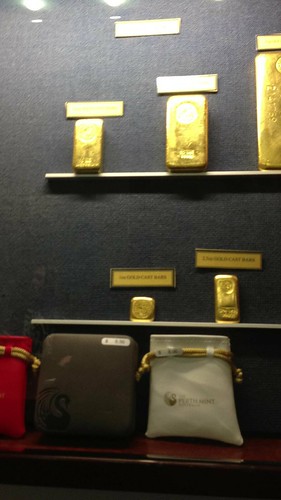
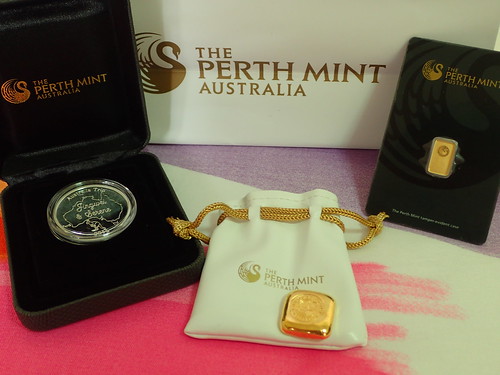
If you get the bars from the other distributors, you will not have a chance to buy a gift bags. The cast bars do not come in any packaging and it is just like a stone in a paper bag. So you have an option to buy the bags if you shop at the Perth Mint.
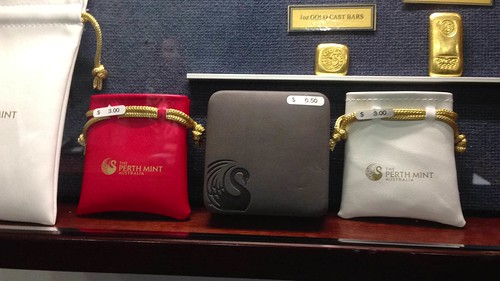
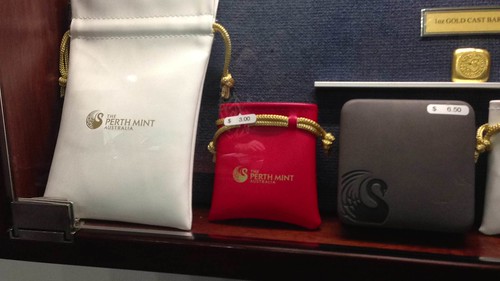 There is also the bigger bag for the bigger bars and boxes for the bullion coins.

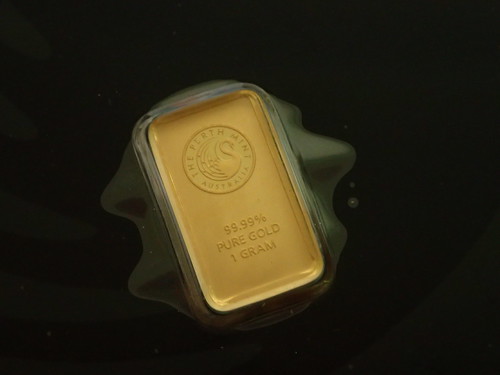
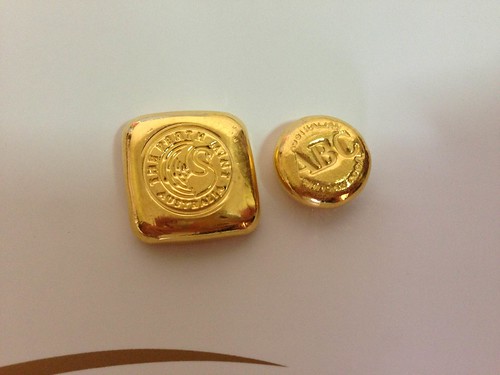
I have been monitoring for months on the prices before going to Perth, we reach Perth on 23 July 2015 and when we got there on 23 July 2015, a Thursday evening and on 24 July 2015, the price was really low. It was the lowest in 5 years and right after China devalued it’s yuan. I didn’t wait till the planned day according to the itinerary to visit Perth Mint but instead, quickly went in the morning on 24 July 2015 to pick up my first ever Gold Bar! I got a Perth Mint minted 1 gram Gold bar and also a 1 ounce Cast Gold Bar! I love their cast bars and such small cast bars are really really hard to find in Singapore. The smallest I’ve ever seen is the Valcambi 50 gram cast bars or the Pamp Suisse 100 gram cast bars! So little ones like this 1 ounce (approx 32.15 gram) are so difficult to find!
 This is the price today for the 1 Ounce Gold Cast Bar, at AU$1635. I paid approximately AU$1530 for that during my trip! What a deal!

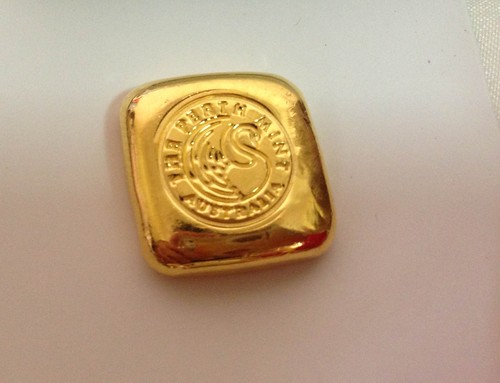
On the the last Friday before we head back, I also popped by the office of ABC Bullion to get their 1/2 Ounce Gold Bar. The price of gold is still low and these are cute like a button.
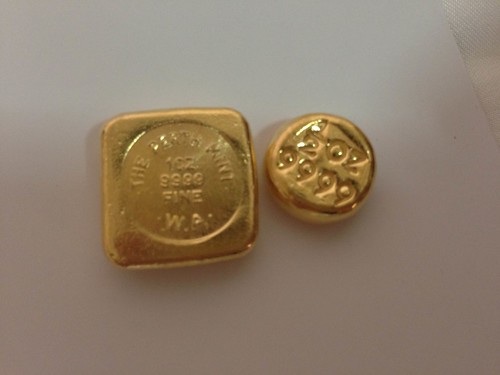
I love cast bars for their ruggedness and the fact that I can touch and hold on to it. Mint bars are prettier to look at but I don’t like that they are trapped in the Assay cards. But 1 gram ones are cute and affordable enough. Such 1 ounce and 1/2 ounce cast bars are much more common in the older days and in Australia / New Zealand. Look at this collection of Vintage Cast Bars that is circulating in the gold collector’s community. No one really knows who it belongs to but they are the dream of cast bars collectors!

When I have the spare cash lying around and when the price is low enough, I will go grab the Pamp Suisse 50 gram or 100 gram cast bar! Till then, one can only dream. I must be poison by the powerful Pharoh’s God to have such lust for gold.
Day 12 of Western Australia Trip, Perth Mint Part 1: Exhibition and Gold Pour Tour
I’m on leave today and will be sharing with you on the last attraction that we visited on the last day!
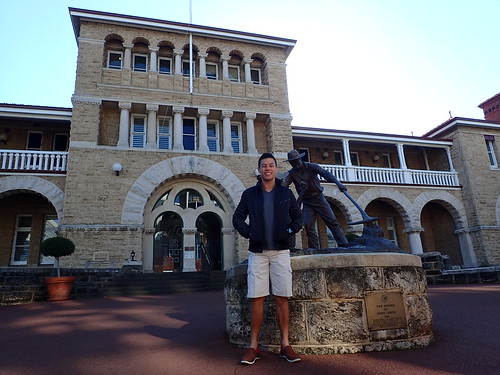
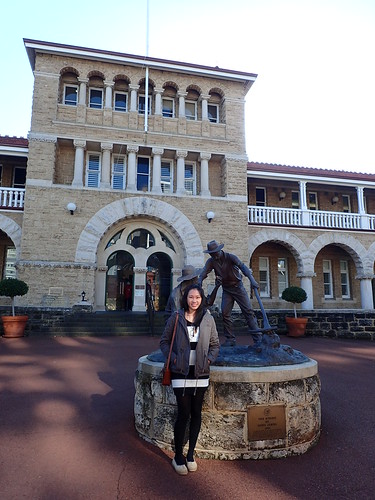
On the 12th day of our Western Australia Trip, after returning our rented vehicle to Baywaters Car Rental, we walked over to the Perth Mint and joined their tour! I am deeply in love with gold and was really looking forward to this tour. I’ve read mostly good reviews on Tripadvisor about the tour except for it’s pricey entrance ticket at AU$19 for adult and it’s no photo policy inside the building. You can only take photos of the building exterior on the outside of the building.
Inside the Perth Mint, there are generally 3 areas of interest, (1) Exhibition and Gold Pour, (2) Gift Shop and (3) Jewelry Shop and Bullion Trading Office. The exhibition and gold pour are only accessible via the guided tour but anyone can pop in to visit the gift shop and the bullion office. I will be sharing on the Exhibition and Gold Pour Tour in this post and the rest in the next post.
Exhibition and Gold Pour Tour
Upon entering the building, there is a counter on the left which sells the tickets for the tour. After payment, you will be tagged and while waiting for the tour to begin, you can start shopping around the gift shop.

The tour begins at the outside of the building where some history on Perth Mint and the gold mining industry in Australia were shared.
We soon realized that our young friendly guide will also be the one demonstrating the gold pour and assisting us with the minting of our customized coins. A fine example of multitasking! Once inside the tour, I didn’t take any photos for fear of getting kicked out of the tour. But for the benefits of my readers, I’ve done some research and got these pictures off other people’s blog or random websites where they have successfully taken some photos! Haha.
 Source: The Perth Mint Blog
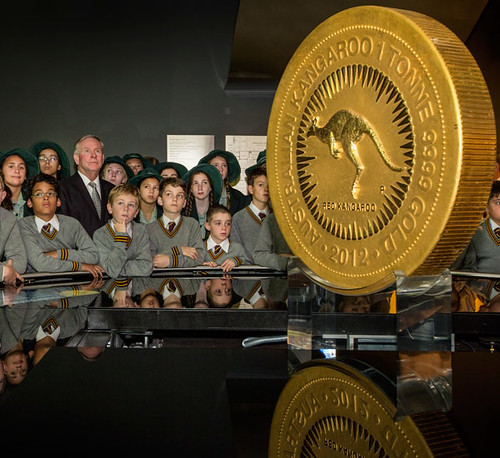
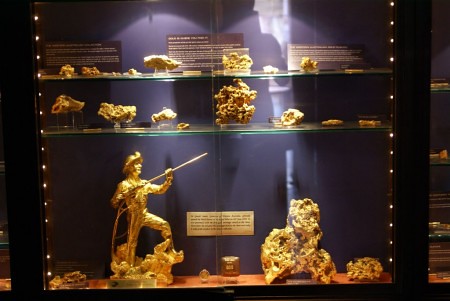
Upon entering the darkened exhibition, you will be greeted with the world’s largest gold coin, all shimmering and weighing 1 tonne of gold! It revolves enchantingly, seemingly calling out to you in the strangest manner. It is surrounded by presentation screens which share the power of gold over time and how gold is associated with God back in the days of Pharaohs.
After the short presentation, you then walked through a series of exhibitions displaying natural gold nuggets, pure gold bars and minted gold coins along with stories from the old prospectors.

Source: Scott Traveler
Source: Scott Traveler

Source: Scott Traveler
 Source: 12 Fly
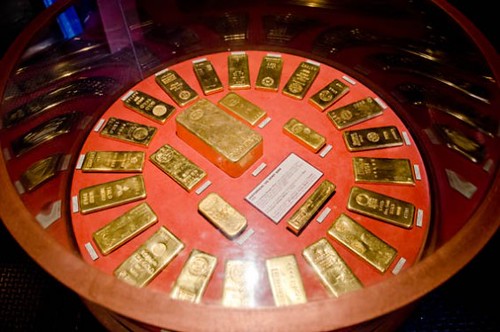
You will also get to attempt to lift up a heavy gold bar in a heavily secured room. I merely lifted the bar to less than a centimetre.
Source: 12 Fly
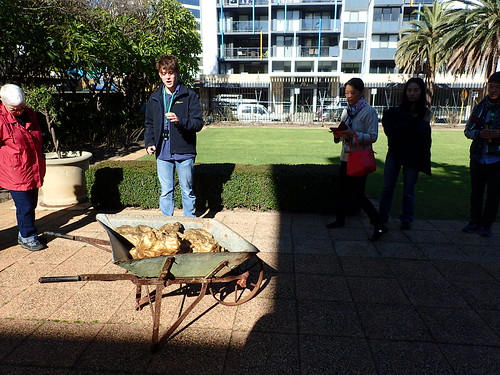
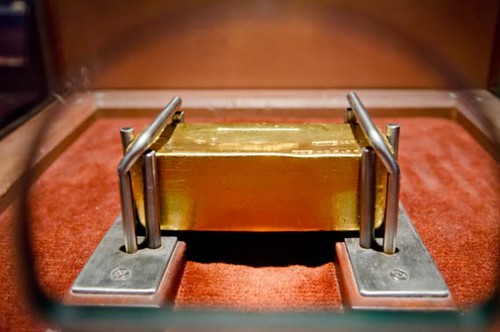
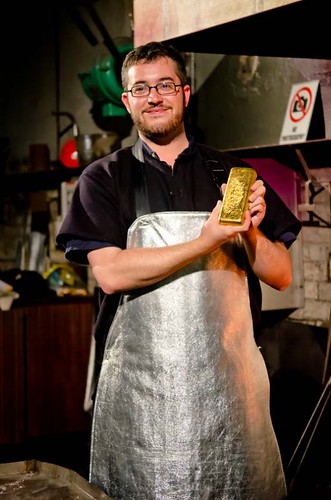
After viewing the exhibition, it is finally the highlight of the tour. A spectacular gold pour demonstration where we see the gold being melted into glowing molten lava-like state, poured into a cast mold, dipped into cooling water and out came a huge shiny bar of gold. This session itself is worth the AU$19 if you’ve never witness a gold pour before.
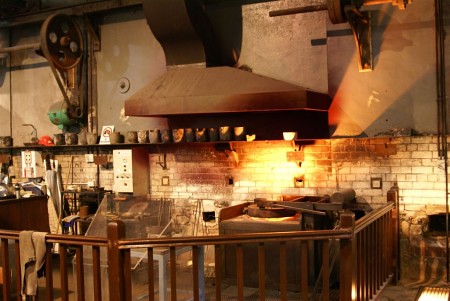
Source: Scott Traveler
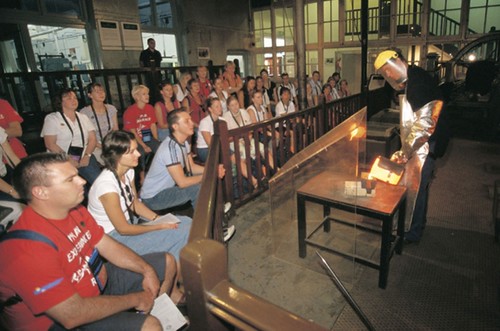
Source: Remote Traveler
Source: 12 Fly
After the gold pour demonstration, we visited the other section of the exhibition where you can weigh yourself and find out how much you are worth according to the day’s gold price if you are made out of solid gold.

This is the only time when you wish you aren’t worth that much. Haha. There after, you can also mint your own souvenir coin for AU$2 just to see how an empty coin is stamped and minted. I also got a plastic capsule for AU$1 just for the fun of it. The quality of the coin minted at Perth Mint is much better compared to those souvenir coins we saw at the various attractions all over Western Australia. This is probably the cheapest souvenir in Perth Mint.
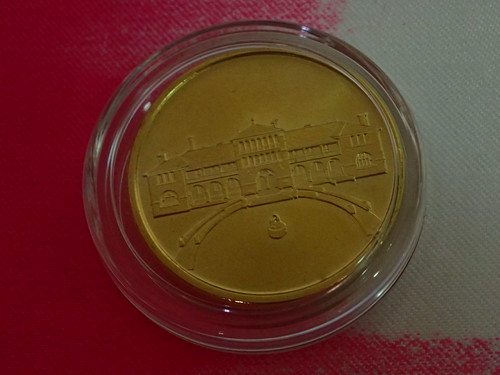
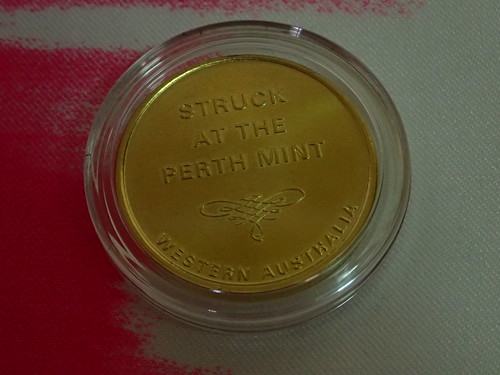
At the end of the tour, visitors can also customized their own souvenir coins in pure silver coin, gold plated coin or even pure gold coin!

If you noticed the wordings on the screen, it says “Australian Trip” at the top of the design, which we thought is a little strange. We changed it to Australia Trip in the end. There are many templates to choose from and you can input any wordings that can fit into the design.

You can also get to witness the engraving action of your own customized coin. Tadah! 
In the next post, you will get to see some sneaky pictures I took of the Gift Shop and Jewelry and Bullion Shop.
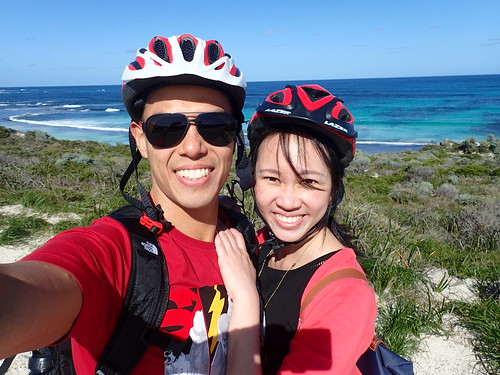
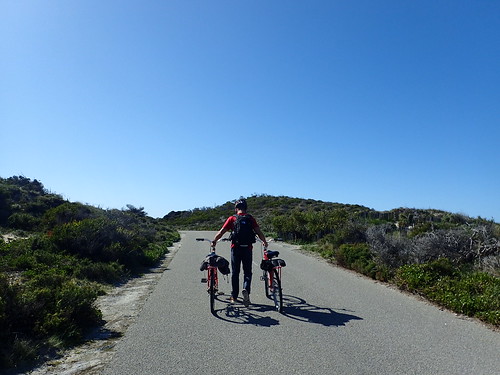
Day 11 of Western Australia Trip, Quokkas and Cycling on Rottnest Island
On the second last day of our trip, we went to Rottnest Island. We only booked the ferry tickets 2 nights before after confirming the weather will be a dry and sunny day! We booked via the Rottnest Express’s Bike package and also used an online coupon code we found in one of the brochures we picked up at the airport. In total, we paid AU$184.53 for discount for two and inclusive of taxes and bike hire.
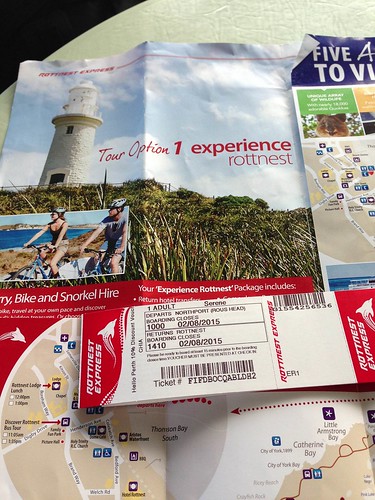
We decided to take the boat at Fremantle, Northport Terminal as there are many parking lots available and all day parking at AU$12. For fear that we will tired ourselves out, we booked a return trip at 2.10pm instead of the early evening timing. So we had almost half a day to tour the island, which in our opinion is just about right. But you need to pedal hard as we only pedal 2/3 of the island and give up part towards West End. We reached Rottnest Island at 10.45am and Rottnest Express had prepared our bike and helmet all ready for us after arrival.
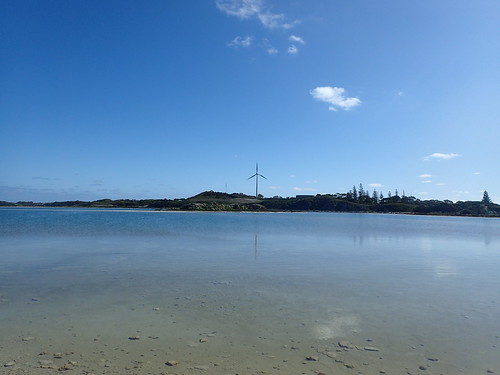
A huge pelican greeted us upon arrival! Helmet is a must on Rottnest Island and bike is the best to get around the island. For individuals who do not want to work out or for seniors who can’t really walk the distance, they can also join the bus tours. There are no other means of transport as the island do not allow other vehicles except for emergencies or service vehicles. I wished they had electric bicycles though, but clean water and electricity is limited on this island.

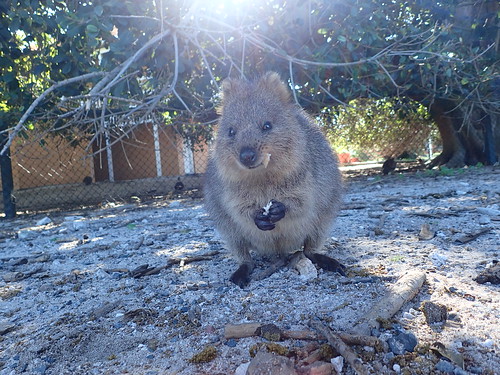
There are two main highlights on this island, (1) the amazing biking route which includes a lighthouse and the crystal clean sea view and (2) their native animal, the Quokka, which is now known as the happiest animal on earth.

The Quokkas look like huge rats who hop around but with a much cuter face. They are also not afraid of people and are rather curious when you approach them! You can be sure to spot them as there are a lot of them! Most of them are found near the settlements which is at the beginning of the cycling route near the jetty.
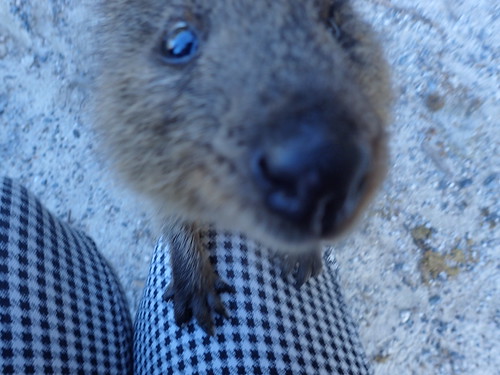

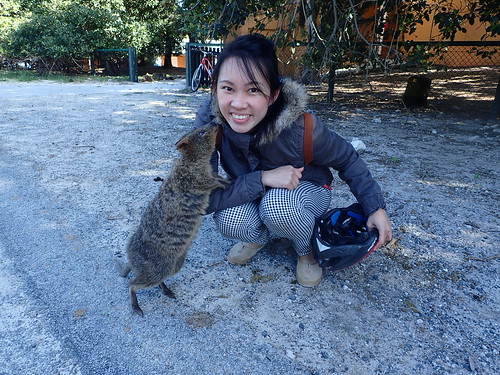
Mission accomplished! A photo with the Quokka!
We then continue cycling which is the beginning of a torturing journey. If someone tells you that Rottness Island is a little hilly, they are lying! It is more than a little! Probably 30 – 40% of the journey is filled with hilly path!

The hilly path begins.
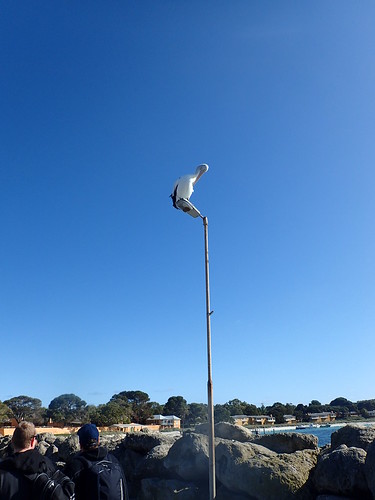
That’s where we want to cycle to! Our first stop, the lighthouse!
We didn’t go up the lighthouse as we have already visited 2 lighthouses during this trip. The view from the lookout point at the lighthouse. What goes up, must come down. Sighhhh
Some of the stops when we couldn’t resist the beautiful sea view! I read that Rottnest Island is a great place for snorkeling during summer! There are many wreck sites to snorkel in.

After cycling up and down many hills, at many points, we ended up pushing up the bike and I am thankful for him who is manly enough to push up two bikes! Haha
In my mind, I kept cursing the hills, thankfully the beautiful view distracted us most of the time. After we completed two thirds of the cycling route, we stopped for a quick lunch which we packed over. There are a few cafes and eateries on the island but we were afraid that we didn’t have enough time. We were left with only 35 minutes after cycling for a quick meal.

After our quick lunch, we were left with some bread and went back to the Quokkas to give them a little treat. Some bread won’t hurt right? Oops.

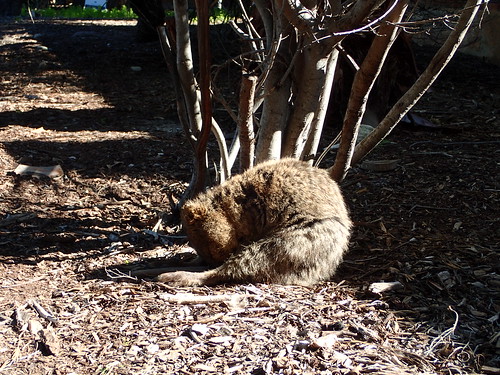
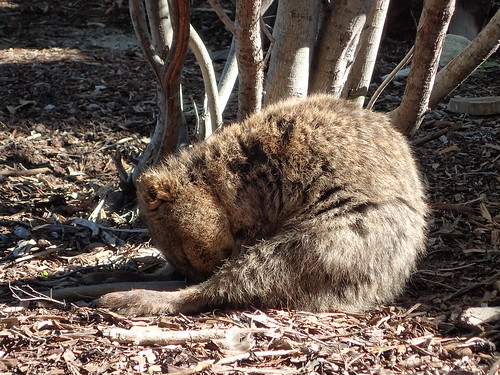
Have you seen a sleeping quokka? Even when they sleep they look so cute.


Day 10 of Western Australia Trip, Sand surfing, Lancelin
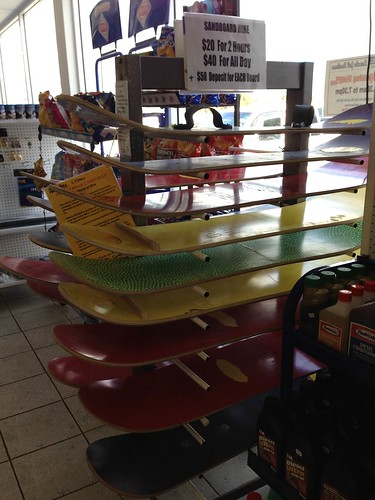
The last stop on Day 10 is to attempt sand surfing at Lancelin. We made a stop at a petrol station which also rents out sand board. I am not sure if this is the best place to rent sand board as we saw other places renting out sand boards along the way after renting at the petrol station. When we reach the sand dune, we also notice that some of the sand boards they used comes with a strap to hold on to at the front of the board, this will probably makes the sliding much easier.
Perhaps you can try renting from somewhere else and if you really can’t find the shops which rent out sand boards, you can rent from this petrol station.

We took a picture of the map which brings us to the entrance of the sand dunes. The entrance is really obscure as there were no proper signage or landmark. When we reach the sand dune area, we parked at the front car park and took a 5 minutes walk in. We saw many other cars which drove right in and park right in front of the dunes and cursed ourselves for not driving in.
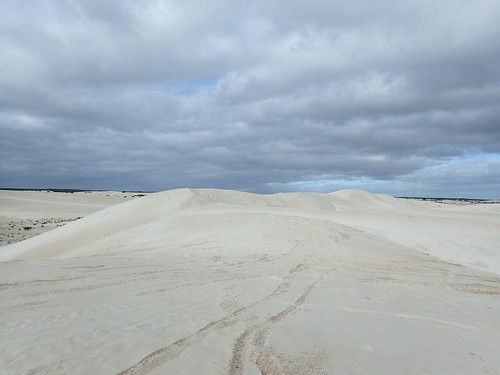
The sand dune is there for anyone to surf at their own risk but if you are wary of your own safety, you can also join tour groups which comes with guides.
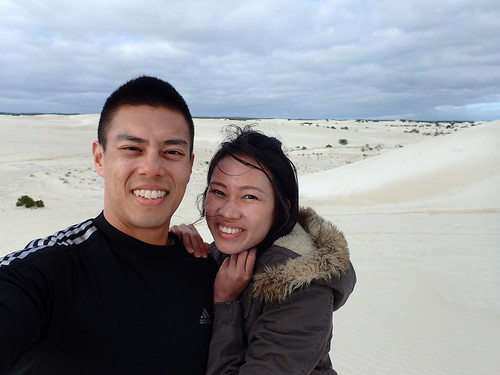
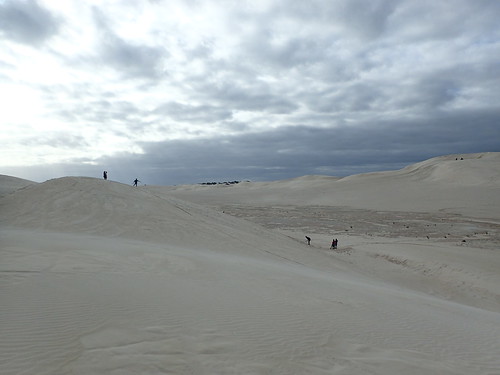
That’s us all excited after seeing the sand dunes!
If you think you will look so cool attempting the sand dunes, you are wrong. The reality is more tumbling than anything!
This happen when you pick a slope too gentle, the board won’t move and we look like an oversize child on a toy car attempting to inch it forward.
And if you found the perfect slope which is not too gentle and steep enough to slide down, you can only try to hang your butt on the board for as long as you can.
But shortly after, you will come crashing down. It can get really fast and we wished we rented a board with a strap to hold on to. After the few seconds of fun, it’s back to climbing up the slope with our board. I must say, it is a lot of hard work for that few seconds of fun.
We only rented a board and took turns riding it.
There is nothing for us to hang on to except to put our hands at the back of our board. We also attempted to slide down with two of us on the board and it is a lot of fun! Because of our combined weight, it slides down much faster and being at the back, at least I can hang on to him. But I cannot imagine his face when riding in front in full speed. Please be warned that the sand is so fine that it gets into everywhere and definitely not for people who are clean freaks! After a few rounds, we had enough of it! It was a tiring session! Haha.
That was the end of our sand surfing career. Haha.
Day 10 of Western Australia Trip, Lobster Shack and Lake Thetis, Cervantes
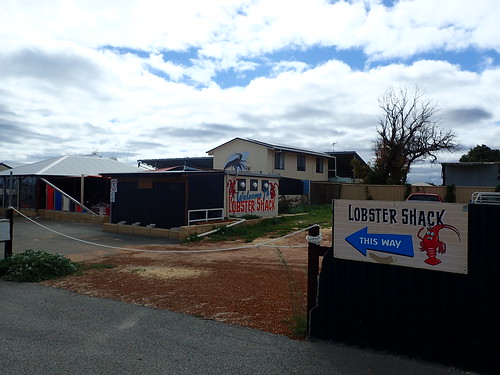
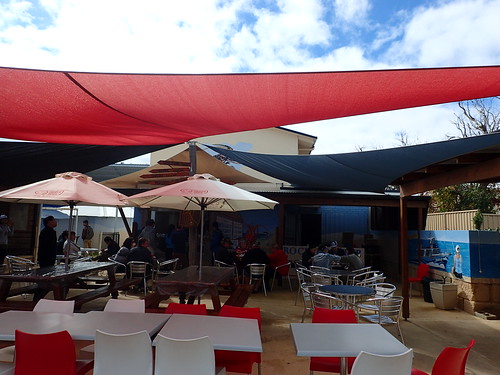
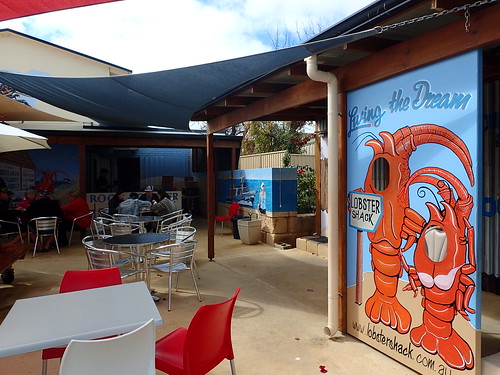
Lunch at Cervantes after visiting Pinnacles Desert is at Lobster Shack! When we visit this place, it is filled with Chinese tourist from tour groups and individual tourists on road trip like us too. There is a lobster factory tour as well but we were not impressed with their online reviews for the tour. This is the only more touristy place we visited but no regrets! The food is expensive but the grilled lobster is absolutely yums.
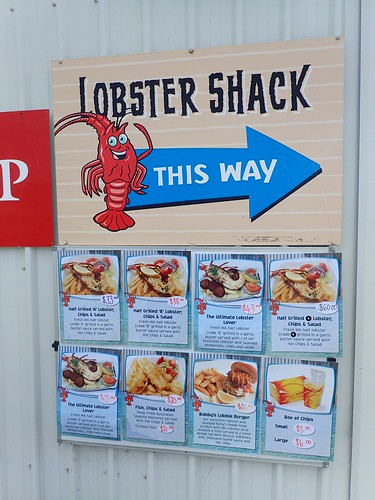
We bought The Ultimate Lobster Lover with Grade E Lobster (their biggest on the menu) at AU$65 and another Ultimate Lobster Lover with Grade B Lobster (their medium size lobster) at AU$43.
 On hindsight, we would have bought two sets with Grade E lobster because the bigger one is so much juicier and sweeter! We didn’t had enough of it! He lovingly sacrificed and let me have most of the Grade E ones! Awwwww. The Seafood Medallion taste a little strange and we are not a fan of it. The set comes with way too much fries too.
 When our food came, we were the only ones who bought the Grade E set and it came in a large plate instead of a metal basket. You can imagine when all the envious eyes staring at us!

Just looking back at the pictures is making me saliva! I want!
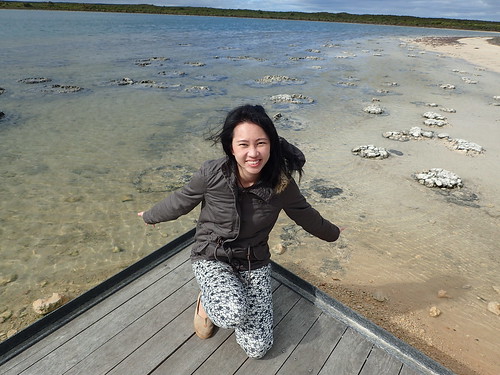
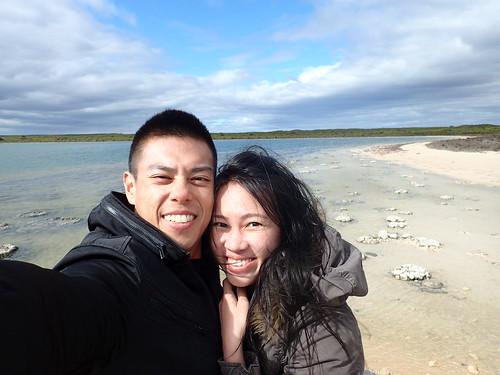
 After lunch, we made a quick stop over at Lake Thetis.
“The lake is one of only a few places in the world with living marine stromatolites, or ‘Living fossils’. The microbes that build stromatolites are a species of cyanobacteria and are similar to those found in 3500 , which are the earliest record of life on Earth. The lake’s stromatolites that look like rocky lumps have been dated to about 3370 years old. Stromatolite communities grow as the this layer of bacteria on their surface deposit calcium, cementing sediment into bulbous structures. Blister mats of cyanobacteria can also be found growing on the margins of the lake in the flood zone. These mats are sensitive and easily disturbed.” – Source: Here
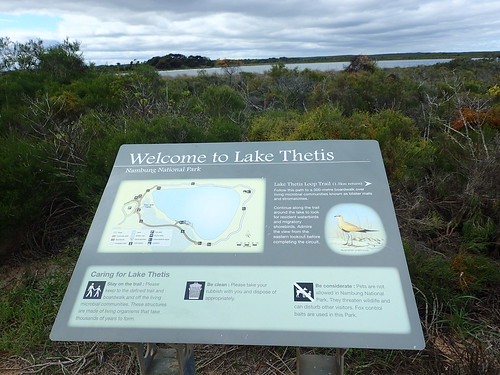 There isn’t much going on at the Lake Thetis but we were there to visit the Stromatolites.

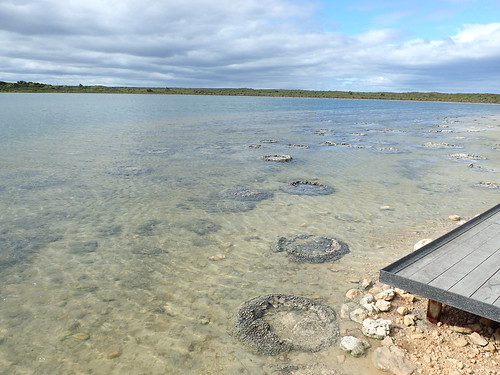 Look at those strange round rocks growing in the lake!
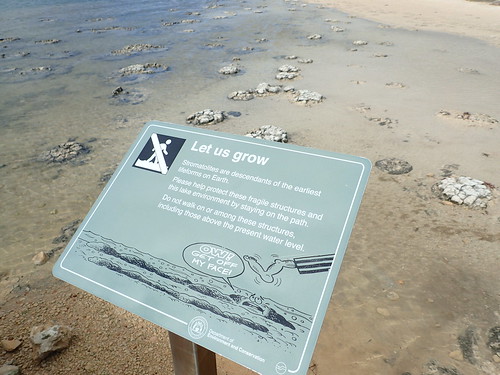 They may look like rock but there are actually living organisms, what a strange sight.

 It sure is windy there!
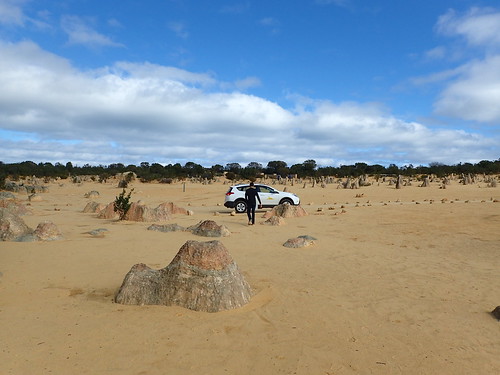
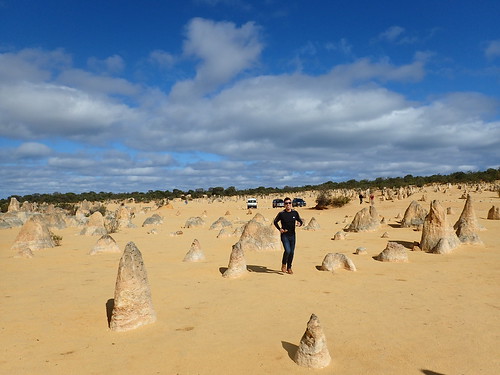
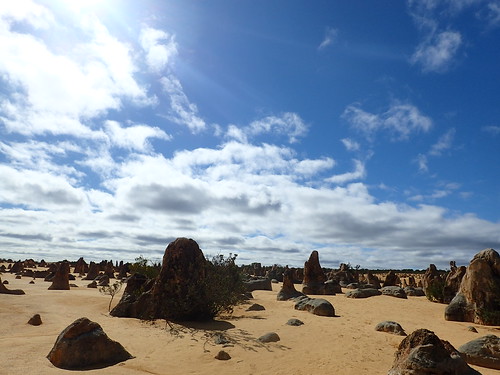
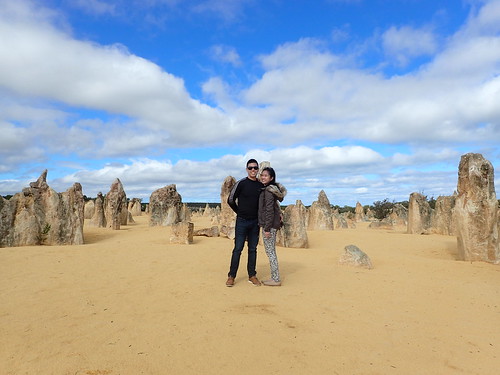
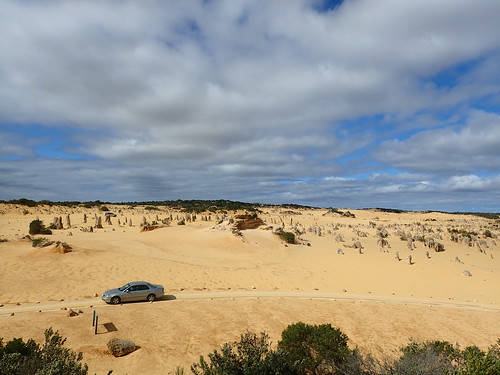
Day 10 of Western Australia Trip, Pinnacles Desert, Cervantes
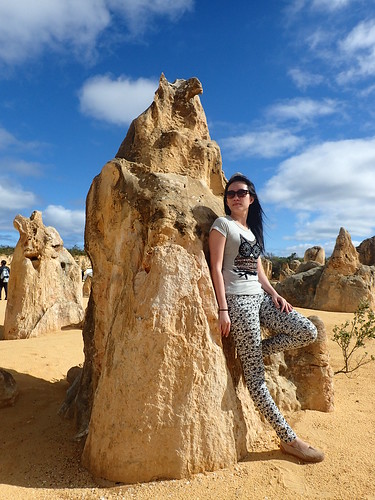
On the 10th day of our Western Australia road trip, we drove 3 hours out of Perth city to visit the Pinnacles Desert in Cervantes. We have to pay AU$12 per vehicle to enter the area and had a lot of fun just exploring and taking photos there. It is a little like the rock formation in Ye Liu, Taiwan, except that it is a lot bigger, much more spectacular and without the crowd and tourist!
When we were there, there were less than 10 tourists exploring the huge place and we were left on our own to take photos. The only rule in Pinnacles is no climbing on the rock formation for safety reasons.
You can choose to park your car at the parking lot and walk in to explore or to directly drive into the desert area. We choose to drive in as our car is a rental car and we don’t have to do all the washing! Haha. There are little corners that is marked out for visitors to park their vehicle along the route.
That’s the man running back from the car after we forgot our tripod stand.
Look at this! Here are some of the nice photos we took! Thankful for the handy tripod stand.

Display our goofy side. Haha
The phone is in the picture because we are using that as a remote control. Heh

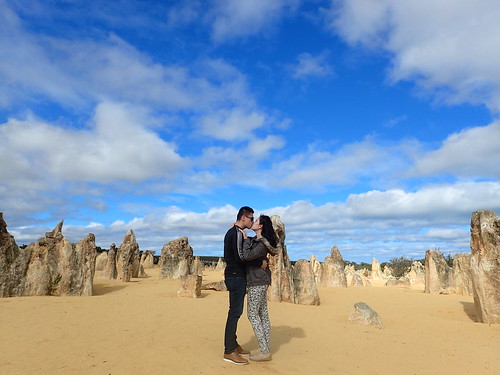
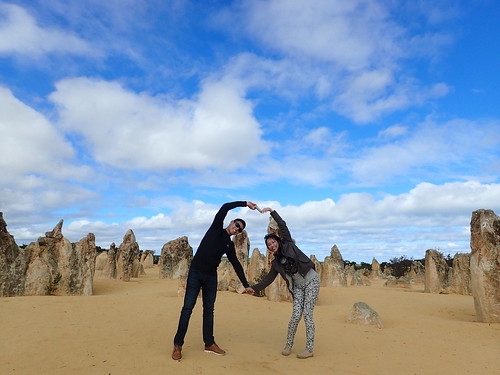
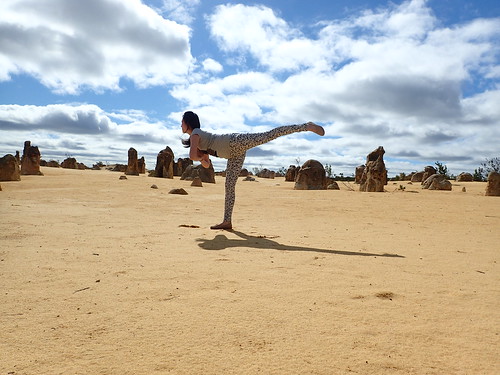
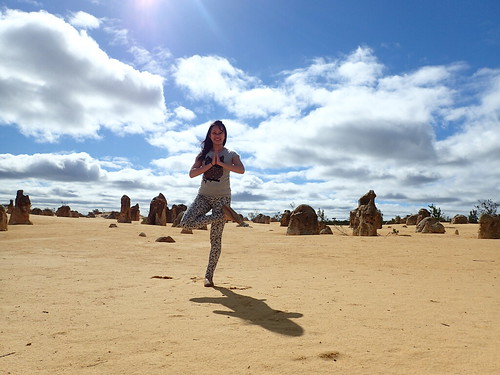
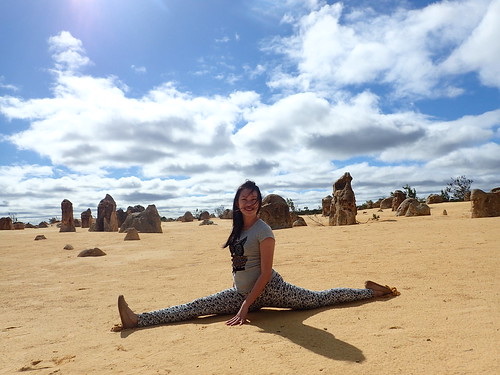
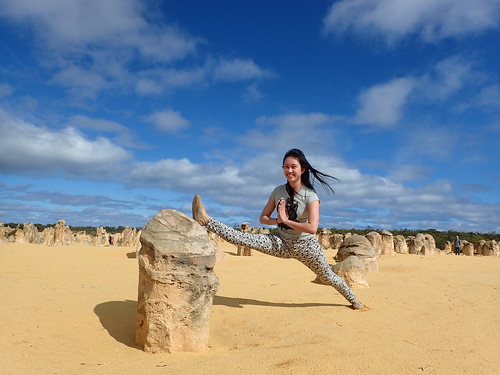
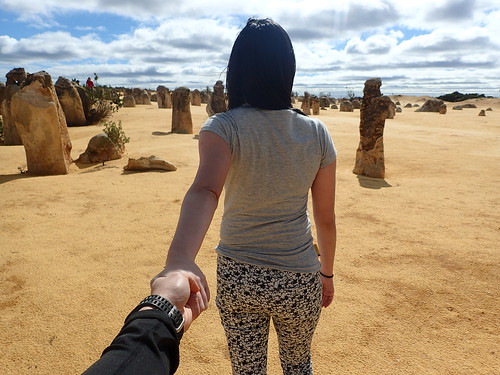
I’ve always wanted to take nice yoga poses picture out in the nature and we jumped at the chance in the Pinnacles.

When it is his turn to take some photos and he didn’t want to be left out taking Yoga inspired poses, he started displaying strange “Kung Fu” poses. What an idiot! Haha.
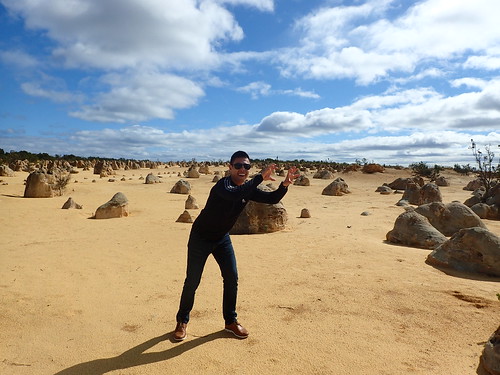
That’s monkey grabbing boobs pose.

And that’s erm, monkey grabbing you know where.
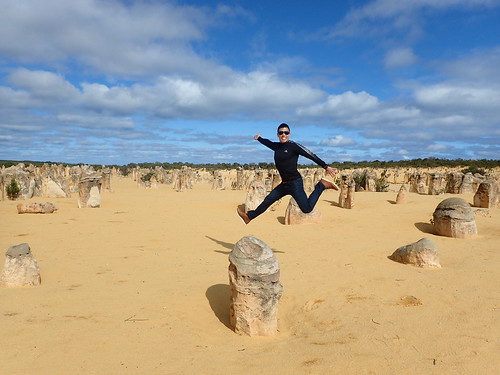
Finally a decent fun pose!
Pinnacles is also a perfect place to take some emo pictures. Haha
Thank you for trusting me in planning out the itinerary for most of our holidays! Just follow me and I will bring you around the world!
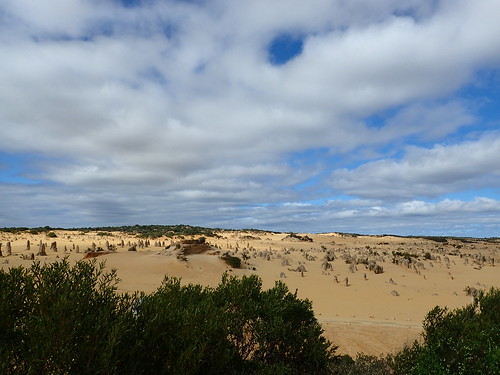
There is also a lookout point to see the Pinnacles from a higher ground.
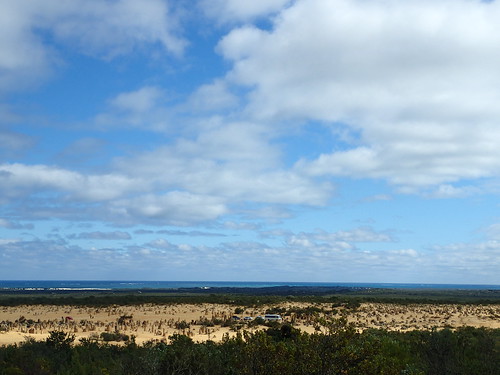
Can you see the ocean beyond the desert!?
That’s the kind of path if you drive in.
Day 9 of Western Australia Trip, Shopping at Swan Valley
After visiting Golden Grove Orchard we headed back to Swan Valley to buy some food souveniors for family and friends.
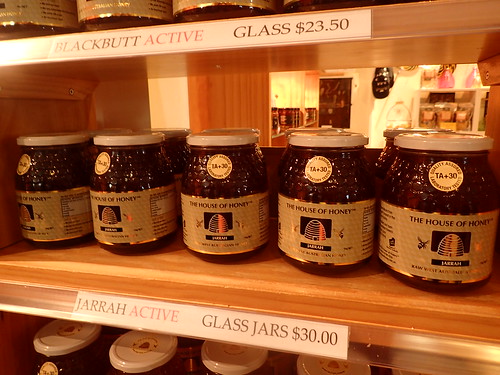
One of our favourite stop is House of Honey which has a wide range of honey for us to try. He loves honey and in the end, he carted a huge carton back.
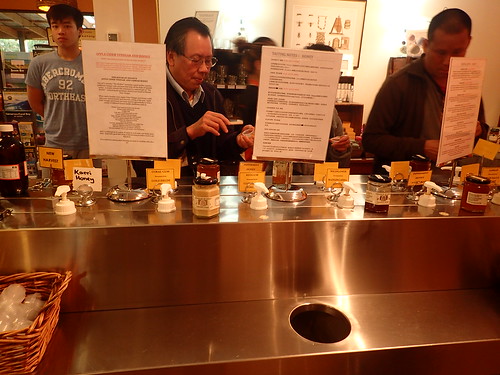
A tasting booth which lets visitors try all their honey and the different flavours of their infused honey. There is even a tasting note for each honey.
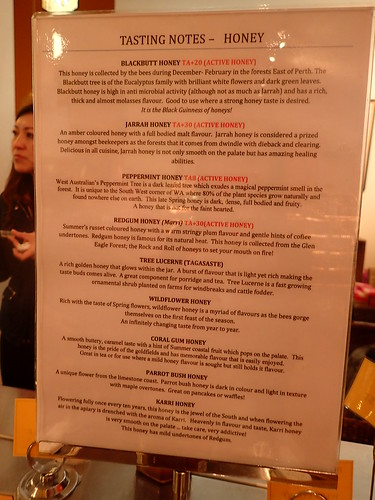
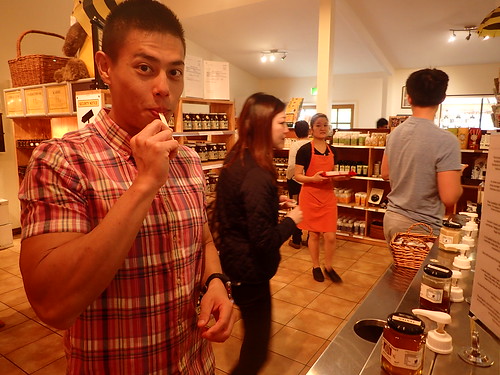
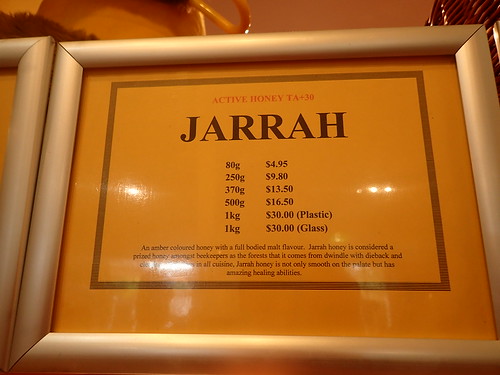
Look how happy he is. In case you are wondering how much their honey is, this is the price for their Jarrad honey. Jarrad honey is one of their most popular honey which is only available in Western Australia. The honey is from their prized Jarrah tree (Eucalyptus marginata) and it has antibacterial and antifungal benefits. Generally speaking, honey is much cheaper in Australia than in Singapore.
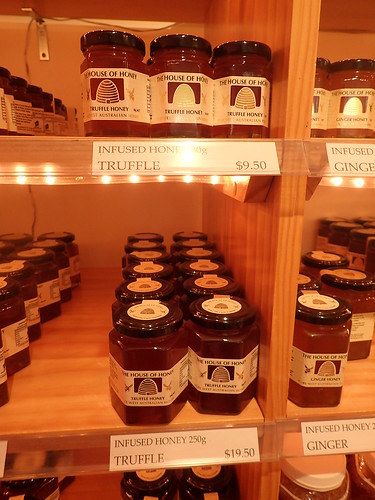
They also have other honey which are infused with flavours.

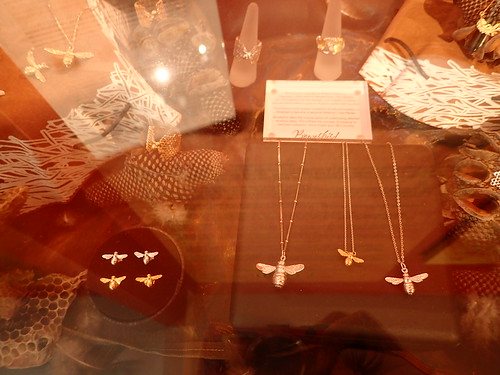
They have other honey and bee themed souveniors as well!
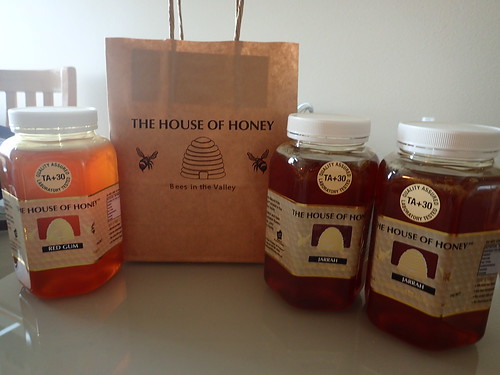
This three bottles are only for his personal consumption. We got a whole lot to bring it back for our staffs.
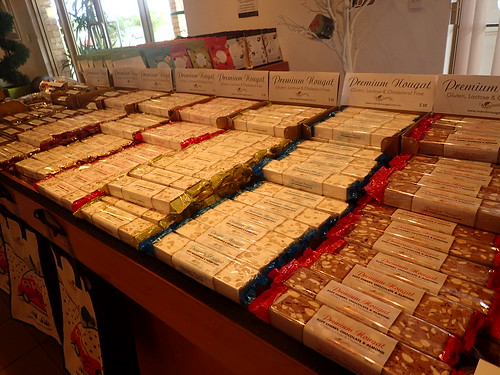
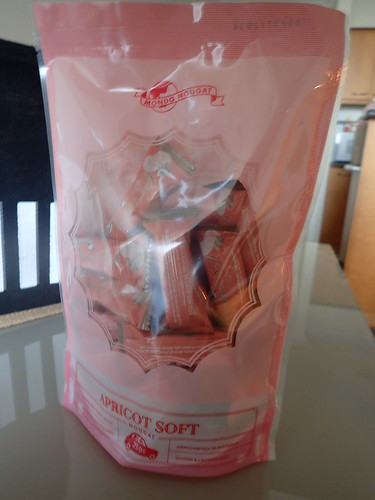
After honey shopping, we pop by Mondo Nougat to get my sister her Apricot Nougat.

Oops, caught him sneaking around looking for toilet.
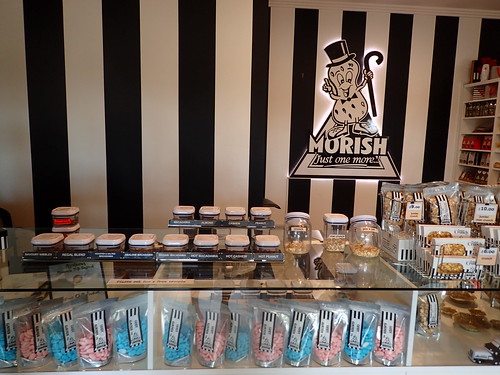
Next door is the popular Morish nuts. Mondo nougat and Morish nuts can also be found in Fremantle Market if you don’t want to make the trip down to Swan Valley.
I love Perth, there are essentially no crowd everywhere we go! Haha.

There are the nuts I got for my family, be warned, even though they are very yummy, especially the Jumbo Family Mix (spicy) they don’t come cheap!

badges


Recent Comments